Red Velvet Brownies Recipe Never Fails: Secret Baker Tips Revealed
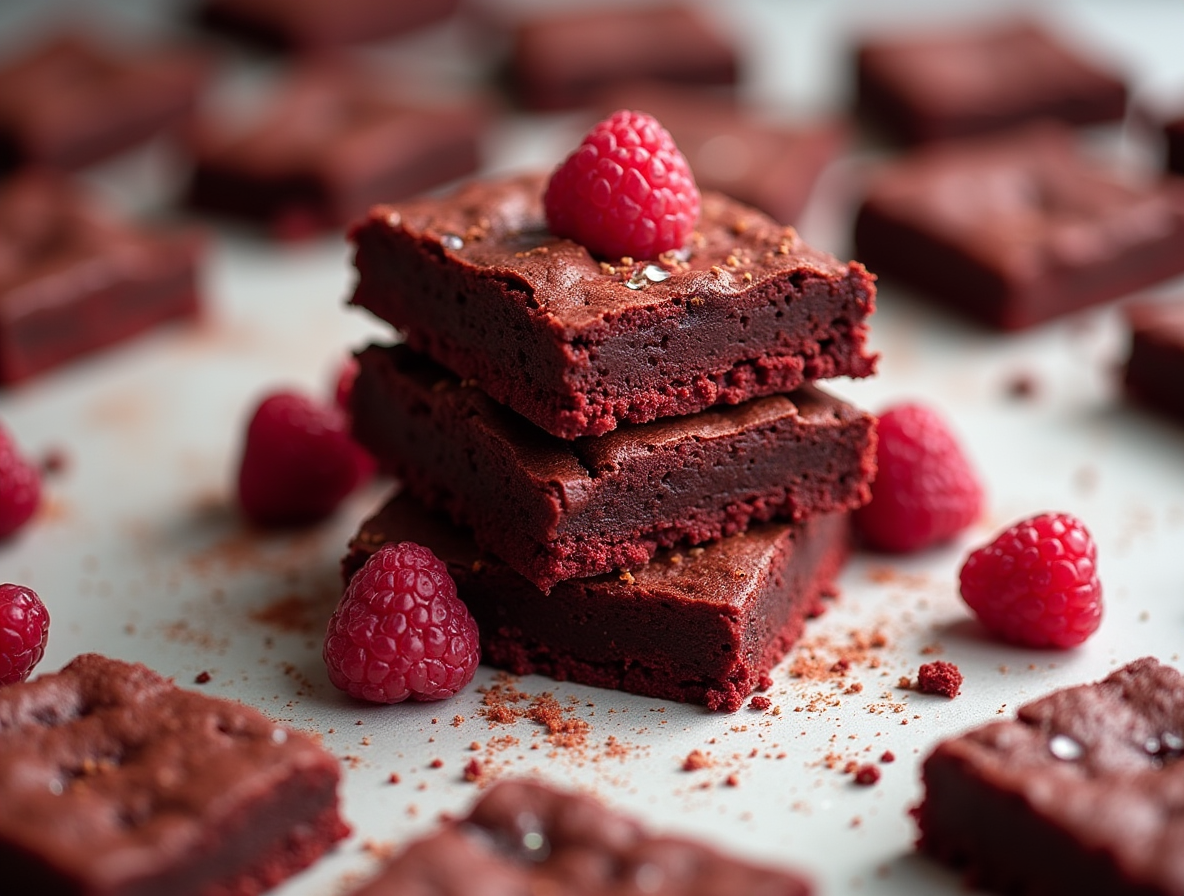
Red velvet brownies recipe enthusiasts know the frustration of a failed batch – but those days are over. These dense, fudgy treats with their vibrant red color and signature shiny, cracked tops have become my go-to dessert for Valentine’s Day and Christmas celebrations. What makes our homemade red velvet brownies truly special is the perfect balance of rich chocolate flavor from 1¼ cups of semisweet chocolate chips and the depth that Dutch-processed cocoa powder brings to each bite.
After testing countless variations, I’ve discovered that making red velvet brownies from scratch doesn’t have to be complicated. In fact, some versions require only 4 ingredients and can be prepared in just 30 minutes. The best red velvet brownies recipe includes a surprising ingredient – white vinegar – which not only brightens the red color but also creates that irresistibly airy yet moist texture we all crave. Additionally, the easy red velvet brownies recipe I’m about to share includes my personal tips for achieving that perfect fudgy consistency every single time. Whether you prefer them classic or with white chocolate chips for extra indulgence, I’ll show you exactly how to make red velvet brownies that never disappoint.
What Makes These Red Velvet Brownies So Reliable
The secret to foolproof red velvet brownies lies in understanding the science behind their texture, appearance, and flavor. These brownies never disappoint when you master the critical elements that make them reliably perfect every time.
Balanced ingredients for perfect texture
Creating the ideal red velvet brownies from scratch requires precision in ingredient ratios. The perfect texture comes from a careful balance of fats – a combination of butter for rich flavor and oil for moisture retention. This dual-fat approach ensures brownies stay gooey days after baking.
Sugar selection plays a crucial role too. While traditional brownies often use both white and brown sugars, red velvet brownies achieve their signature texture primarily through granulated sugar, which creates chewiness. Some recipes incorporate light brown sugar to add depth and contribute to that “velvet” mouthfeel without compromising the vibrant color.
Eggs serve dual purposes – the whites provide structure through protein, while the yolks add tenderness through fat. Furthermore, limiting flour (typically just ½ cup) prevents the brownies from becoming cakey. Many successful recipes include cornstarch, which helps maintain chewiness and contributes to that quintessential shiny top.
Why the shiny top always forms
That gorgeous crackly, shiny crust on top of brownies isn’t magic – it’s science. The shiny top forms when dissolved sugar crystals recrystallize at the surface during baking and reflect light. This can only happen when sugar is sufficiently dissolved in the batter.
The key technique? Whisking eggs and sugar together thoroughly – up to 10 minutes according to expert bakers. This process introduces air into the batter, creating aeration that leads to a finished product that’s shiny, well-risen, and perfectly crackled.
Room temperature eggs are non-negotiable since warmer temperatures help sugar dissolve more effectively. Moreover, the longer you whip the egg-sugar mixture, the thinner and shinier the resulting crust. Consequently, even the order of mixing ingredients matters – always add sugar to eggs first for best results.
The role of red food coloring and vinegar
The signature ruby hue comes primarily from food coloring, though the amount needed varies by type. Gel food coloring delivers concentrated color with minimal batter dilution. For the deepest red shade, vinegar plays a surprising supporting role.
Vinegar serves multiple crucial functions beyond just adding tang. First, it brightens colors naturally, enhancing the red pigment. Second, it provides that slight acidic tang that defines authentic red velvet flavor. Finally, vinegar tenderizes gluten in the flour, contributing to the brownies’ fudgy, soft texture.
The classic combination of vinegar with natural cocoa powder (rather than Dutch-processed) creates a chemical reaction that enhances the mahogany hue. Interestingly, while vinegar is essential for authentic flavor, it doesn’t significantly affect taste or texture if omitted – though you’ll miss that characteristic red velvet tang.
Step-by-Step: How to Make Red Velvet Brownies from Scratch
Making homemade red velvet brownies requires precision and attention to detail. I’ve refined this process over countless batches to create a foolproof method that delivers perfect results every time.
1. Prepare the chocolate base
First of all, preheat your oven to 350°F (180°C) and line an 8-inch or 9-inch square pan with parchment paper. For the chocolate base, you have two options. Either melt chocolate chips with oil in a microwave using 15-30 second intervals, stirring between each, or use a double boiler method by placing chocolate and butter over simmering water. Once melted, add 2-3 teaspoons of red gel food coloring and stir until fully incorporated. Set this mixture aside to cool slightly before proceeding.
2. Whip the eggs and sugar for structure
Subsequently, in a large bowl, beat together eggs and sugar (both granulated and brown) for 5-6 minutes until the mixture doubles in volume and lightens in color. This extended beating time is essential – it’s the secret to achieving that coveted shiny, crackly brownie top. Add vanilla extract and a teaspoon of white vinegar to enhance both color and flavor.
3. Combine dry and wet ingredients
Next, slowly pour your cooled chocolate mixture into the egg mixture while mixing on low speed. In a separate bowl, whisk together flour, cocoa powder, and salt. Gently fold these dry ingredients into your wet mixture using a rubber spatula until just combined. Be careful not to overmix as this will make your brownies tough instead of fudgy. For extra indulgence, fold in additional chocolate chips or chunks.
4. Bake at the right temperature
Pour the batter into your prepared pan and smooth the top with an offset spatula. Bake in your preheated oven for approximately 25-35 minutes. The brownies are done when a toothpick inserted comes out with a few moist crumbs attached—not wet batter. Notably, some bakers recommend a clever trick: remove the pan after 20 minutes and firmly tap it against a flat surface 2-3 times before returning it to the oven for the remaining bake time.
5. Let them cool before slicing
Afterward, allow the brownies to cool completely in the pan. Indeed, patience is crucial here—slicing too soon will give you messy brownies! For even cleaner cuts, refrigerate them for at least an hour before slicing with a sharp knife. Between each cut, wipe the knife clean for perfect edges.
Secret Tips from Experienced Bakers
After years of perfecting my red velvet brownies recipe, I’ve gathered invaluable tips from experienced bakers that transform good brownies into extraordinary ones. These professional secrets ensure consistent results every time you bake.
Use room temperature eggs for better mixing
Room temperature eggs are non-negotiable for the perfect red velvet brownies from scratch. Cold eggs can cause butter to harden and clump in your batter, creating texture issues. To quickly bring eggs to room temperature, place them in a bowl of warm water for five minutes before using. Given that proper ingredient temperature affects how sugar dissolves, this simple step significantly impacts your brownies’ signature shiny top.
Don’t overmix after adding flour
Overmixing is the silent killer of homemade red velvet brownies. Once you add flour, mix only until the dry ingredients just disappear. Essentially, overmixing develops gluten, making brownies tough instead of fudgy. For best results, use a gentle folding motion with a spatula rather than vigorous stirring. This preserves the air bubbles needed for that perfect crackly crust while maintaining a velvet-like interior.
How to test for doneness without drying them out
Testing for doneness is an art form with red velvet brownies. The classic toothpick test should reveal moist crumbs—not wet batter and not completely clean. Even more importantly, look for set edges with a center that still has a slight jiggle. For absolute precision, an internal temperature of 180°F indicates perfectly baked brownies. Remember that it’s better to slightly underbake than overbake, as brownies continue cooking as they cool.
Why resting the batter helps flavor
First and foremost, opinions vary on resting brownie batter. Some master bakers swear by refrigerating covered batter for up to 72 hours, claiming this rest period improves flavor and allows flour to fully hydrate for supremely decadent results. Conversely, others maintain that resting develops unwanted gluten. My compromise: let brownies cool in the pan for 20 minutes, then refrigerate for an hour before slicing for perfect, clean-edged squares.
How to get that deep red color every time
For that iconic deep red, gel food coloring outperforms liquid varieties every time. Gel coloring is more concentrated, requiring just a teaspoon for vibrant results. Particularly clever is the technique of mixing coloring into a small portion of batter first, then incorporating this into the main mixture to ensure even distribution. Additionally, don’t forget that vinegar enhances the red hue through its reaction with cocoa powder. Lastly, expect the color to deepen during baking.
Ways to Customize Your Red Velvet Brownies
Once you’ve mastered the basic red velvet brownies recipe, the fun truly begins with customization. These versatile treats can be transformed in countless ways to suit your taste preferences or dietary needs.
Add-ins: chocolate chips, nuts, or dried fruit
The simplest way to elevate your homemade red velvet brownies is by folding in additional ingredients. White chocolate chips are especially popular in red velvet brownies, creating beautiful color contrast and adding sweetness. Alternatively, dark or milk chocolate chips provide extra richness. For texture contrast, chopped nuts like walnuts, pecans, or almonds add satisfying crunch. Dried fruits such as cherries, cranberries, or apricots contribute chewy sweetness that complements the chocolate notes. Furthermore, some bakers swear by adding shredded coconut or even crushed Oreos for unexpected flavor dimensions.
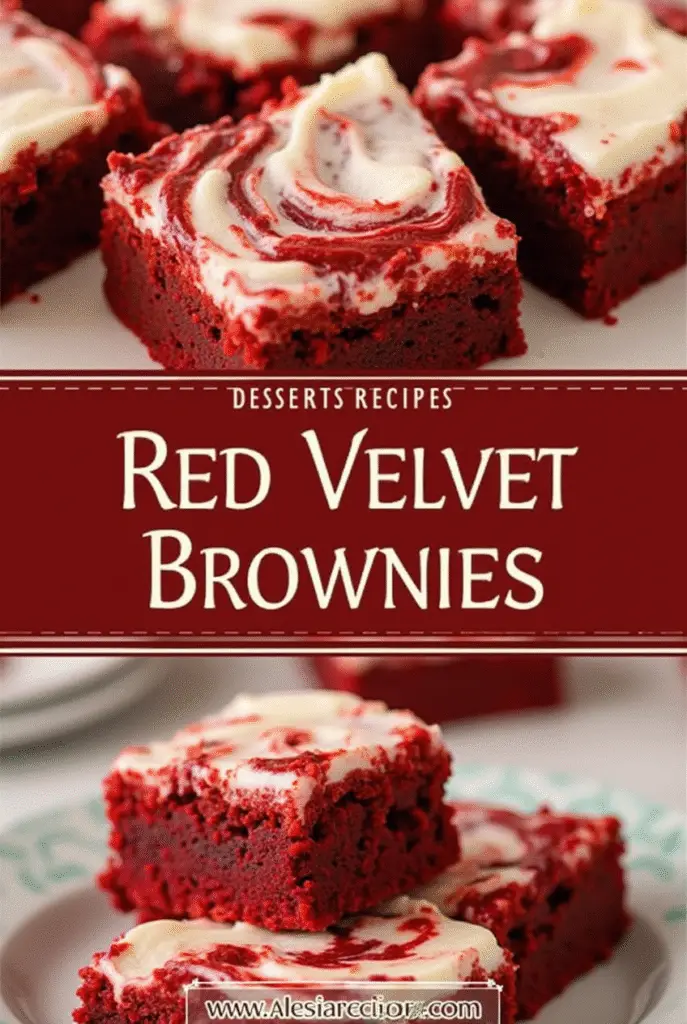
Swirl in cream cheese for a cheesecake twist
Perhaps the most beloved variation is the red velvet cheesecake brownie. To create this showstopper, prepare a simple cheesecake mixture by beating 8 ounces of cream cheese with 1/4 cup sugar, an egg yolk (or white for brighter swirls), and vanilla extract until smooth. Pour half your brownie batter into the pan, add the cream cheese mixture, then top with remaining brownie batter. Henceforth, use a toothpick or knife to create gorgeous marble patterns by swirling the layers together. This technique creates a stunning contrast both visually and in flavor complexity.
Top with sea salt or frosting
Occasionally, simple toppings make the biggest impact. A sprinkle of sea salt over freshly baked brownies enhances chocolate flavors through delightful sweet-salty contrast. For more indulgence, cream cheese frosting is traditional, though a simple white chocolate drizzle works beautifully too. Specifically, wait until brownies are completely cool before adding frosting to prevent melting.
Make them gluten-free or dairy-free
Fortunately, red velvet brownies from scratch can accommodate dietary restrictions. For gluten-free versions, substitute a quality gluten-free flour blend (like King Arthur or Pamela’s). Dairy-free adaptations might use vegan butter, plant-based milk, and dairy-free chocolate chips. Surprisingly, vegan versions can replace eggs with flax eggs (1 tablespoon ground flax + 2.5 tablespoons water per egg).
Conclusion
Red velvet brownies stand as one of the most rewarding treats to master in your home kitchen. Throughout this article, we’ve unlocked the science behind what makes these vibrant treats so reliable – from the careful balance of fats and sugars to the crucial egg-whisking technique that creates that signature shiny top.
The step-by-step process might seem detailed at first glance. Nevertheless, each instruction serves a purpose in delivering consistently perfect results. Room temperature eggs, measured mixing times, and proper cooling all contribute to brownies that impress every single time.
Professional baker secrets undoubtedly make a difference. Testing for doneness correctly ensures fudgy centers, while understanding the role of vinegar helps achieve that characteristic tangy flavor and vibrant color. These small but significant details transform ordinary brownies into extraordinary ones.
Customization options allow you to make these brownies truly your own. White chocolate chips, cream cheese swirls, or even dietary adaptations mean everyone can enjoy these treats regardless of preferences or restrictions.
Making red velvet brownies from scratch requires some attention to detail. Still, the results far outweigh the effort. You now possess all the knowledge needed to create bakery-quality red velvet brownies at home. Give this recipe a try during your next celebration or whenever chocolate cravings strike. The compliments will surely follow, and you’ll find yourself returning to this foolproof recipe time after time.
FAQs
Q1. What’s the secret to achieving the perfect texture in red velvet brownies? The perfect texture comes from a careful balance of ingredients. Use a combination of butter and oil for richness and moisture, and limit the amount of flour to prevent cakiness. Properly whisking eggs and sugar creates a shiny top and fudgy interior.
Q2. How can I ensure my red velvet brownies have a vibrant red color? Use gel food coloring for the most concentrated color with minimal batter dilution. Add a teaspoon of white vinegar to enhance the red hue and provide a slight tang. The color will deepen during baking, so don’t worry if it looks lighter in the batter.
Q3. What’s the best way to test if red velvet brownies are done? Look for set edges with a center that still has a slight jiggle. A toothpick inserted should come out with a few moist crumbs, not wet batter. For precision, aim for an internal temperature of 180°F. It’s better to slightly underbake than overbake.
Q4. Can I customize red velvet brownies for dietary restrictions? Yes, you can make gluten-free versions by using a quality gluten-free flour blend. For dairy-free adaptations, use vegan butter, plant-based milk, and dairy-free chocolate chips. Eggs can be replaced with flax eggs for a vegan version.
Q5. How can I add extra flavor to my red velvet brownies? Try folding in white chocolate chips, nuts, or dried fruit for added texture and flavor. For a cheesecake twist, swirl in a cream cheese mixture. You can also top the brownies with sea salt for a sweet-salty contrast or add a cream cheese frosting for extra indulgence.