Perfect Red Velvet with Strawberries: A Foolproof Baking Guide
Red velvet with strawberries combines two iconic flavors that have delighted dessert lovers for generations. Dating back to the 1920s, the original red velvet cake first graced tables at New York’s prestigious Waldorf-Astoria hotel. After almost a hundred years, this classic dessert certainly deserves special attention in our baking repertoire.
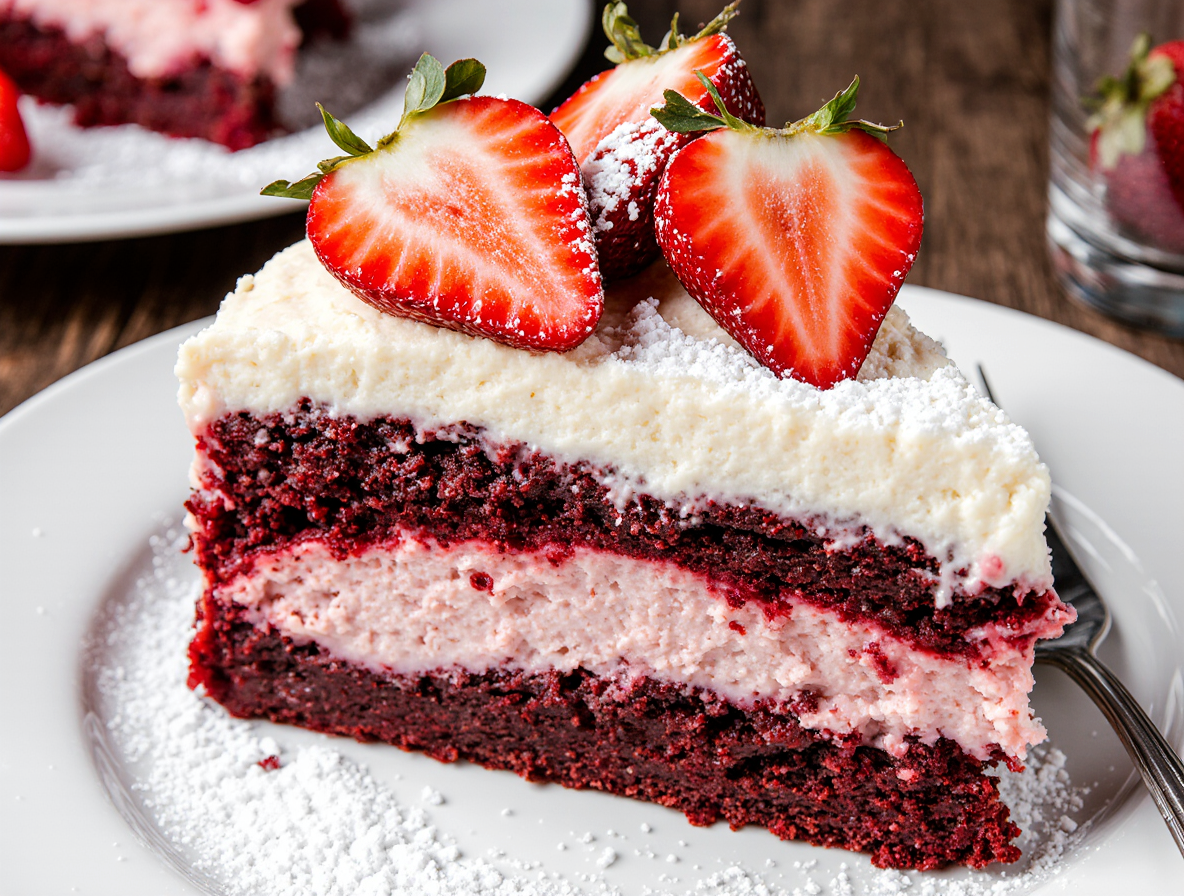
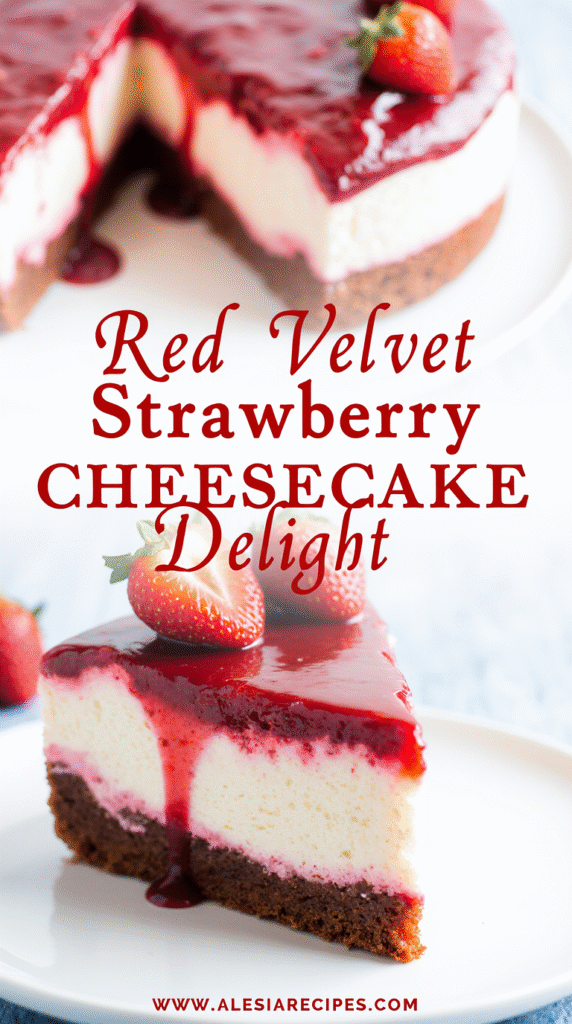
When we transform this timeless cake into a red velvet strawberry cheesecake, we create something truly spectacular. This decadent creation pairs a vibrant red velvet crust with creamy cheesecake filling and fresh strawberry topping, resulting in a show-stopping dessert perfect for birthdays, anniversaries, or holidays. Although this impressive treat packs about 820 calories per slice, the approximately 5-hour preparation time yields 12 servings of pure indulgence. In this guide, I’ll walk you through creating the perfect red velvet with strawberries, whether you’re aiming for a layered cake with berries on top or the ultimate red velvet strawberry cheesecake.
Choosing the Right Ingredients for Red Velvet with Strawberries
The success of your red velvet with strawberries creation depends greatly on selecting quality ingredients. Each component plays a crucial role in achieving that perfect balance of flavors and textures that makes this dessert so irresistible.
Red velvet cake essentials
For an authentic red velvet cake, you’ll need specific ingredients that create its distinctive character. Buttermilk is non-negotiable – it reacts with baking soda to create that tender, velvety crumb that defines this cake. I recommend using real cultured buttermilk rather than substitutes for the most authentic flavor. White vinegar might seem strange in a cake, but this acidic ingredient is essential – it works with the baking soda for proper leavening and contributes to that subtle tangy taste. For the base, cake flour produces a softer, lighter texture than all-purpose flour due to its lower protein content. However, if you only have all-purpose flour, you can mix it with cornstarch (3 tablespoons for every 2¼ cups flour) to achieve similar results.
Best strawberries to use
Selecting perfect strawberries requires a bit of know-how. Instead of relying solely on color, which can be misleading since strawberries continue to redden after picking without getting sweeter, use your nose. Sweet, ripe strawberries have a distinctive fragrant aroma – this is the most reliable indicator of flavor. For baking purposes, look for firm berries with vibrant red color throughout (not just surface color) and fresh green tops. Smaller berries aren’t necessarily sweeter – sweetness depends on variety and growing conditions, with sunshine being the key factor. For frozen applications, don’t thaw berries before adding to batter – this prevents bleeding that can tint your mixture.
Cream cheese vs mascarpone
Both cream cheese and mascarpone create delicious frostings, but with notable differences. Mascarpone has a significantly higher milk fat content (60-75%) compared to cream cheese’s 33%, giving it a silkier, more buttery character. While cream cheese offers that classic tangy flavor that cuts through sweetness, mascarpone provides a milder, velvety taste. Furthermore, combining both creates an exceptional frosting – 12 ounces of cream cheese with ¾ cup mascarpone (both at room temperature) yields a luxurious texture with balanced flavor.
Food coloring and cocoa balance
Achieving the signature red color requires balancing cocoa and coloring agents. Traditional red velvet relied on the chemical reaction between non-dutched cocoa powder, buttermilk, and vinegar for its reddish hue. Today, we enhance this with food coloring. Gel food coloring works best – it’s more concentrated than liquid, requiring less product (about 1-2 teaspoons versus several tablespoons of liquid). For cocoa, use natural unsweetened powder rather than Dutch-processed – typically 3 tablespoons provides that hint of chocolate without overwhelming the cake.
Whipped cream tips for stability
Standard whipped cream can quickly deflate, but properly stabilized cream holds its shape beautifully. The most effective stabilizing method uses unflavored gelatin, which doesn’t affect flavor but provides structure. For a less conventional approach, instant pudding mix, cornstarch, or cream of tartar can also work. Another excellent option is incorporating mascarpone or crème fraîche – these dairy products maintain aeration while adding subtle richness. Stabilized whipped cream can last 4-5 days refrigerated versus mere hours for standard versions.
Step-by-Step: Building the Red Velvet Strawberry Cheesecake
Building a red velvet strawberry cheesecake requires precision and patience. This classic dessert combination comes together through carefully executed steps that ensure perfect texture and flavor in every bite.
1. Making the red velvet crust
Creating the perfect foundation starts with preparing your 9-inch springform pan. Double-wrap the bottom with heavy-duty aluminum foil to prevent water seepage. For a traditional approach, pulse chocolate graham crackers in a food processor until they form fine crumbs, then mix with melted butter and a tablespoon of sugar. Alternatively, use crushed Oreo cookies (cream included) for a richer base. Press the mixture firmly into the pan using a measuring cup for even distribution, but avoid packing too tightly as this makes cutting difficult later. For an innovative twist, use an actual red velvet cake layer as your “crust”.
2. Preparing the cheesecake filling
Beat softened cream cheese for about 5 minutes until light and fluffy. Subsequently, add eggs, sugar, and sour cream, mixing until smooth. Scrape down bowl sides frequently to eliminate lumps. For authentic red velvet flavor, incorporate cocoa powder (2-3 teaspoons) and concentrated gel food coloring until reaching your desired vibrant red. Importantly, once eggs are added, minimize mixing to prevent over-whipping, which causes rising and deflating during baking, leading to cracks. Pour this creamy mixture over your prepared crust.
3. Baking with a water bath
A water bath creates the humid environment cheesecakes need for even baking. Place your foil-wrapped springform pan inside a larger roasting pan, then fill with hot water about 1-inch deep. Alternatively, place a water-filled pan on the lower rack while baking the cheesecake on the middle rack. This method provides moisture without risking leakage. Bake at 325°F for approximately 60-70 minutes until the center appears set but still jiggles slightly when tapped.
4. Cooling and layering properly
Proper cooling prevents cracks and ensures perfect texture. After baking, turn off the oven, crack the door slightly, and allow the cheesecake to cool gradually for at least one hour. Once at room temperature, refrigerate overnight before adding strawberry layers. For a layered approach, freeze the cheesecake layer first, making assembly significantly easier. When adding strawberry layers, place sliced strawberries directly on the cheesecake before adding any mousse or topping.
Creating the Strawberry Layers and Toppings
The visual magic of a red velvet with strawberries dessert lies in its carefully crafted layers and decorative elements. These finishing touches not only enhance appearance but also deliver concentrated flavor in every bite.
1. Strawberry mousse or puree layer
Strawberry mousse adds luxurious texture between cake layers. For an authentic mousse, blend strawberries into a smooth puree, then cook it down until reduced by half to intensify flavor. Alternatively, create a stabilized “mock mousse” using instant pudding, heavy cream, and strawberry extract. For maximum stability, fold strawberry whipped cream into melted white chocolate, creating structure that holds its shape. This mixture should chill at least 2 hours before assembly.
2. Stabilized strawberry whipped cream
Perfect strawberry whipped cream maintains its structure for days. Use freeze-dried strawberry powder for concentrated flavor without added moisture. For vegetarian-friendly stabilization, incorporate cream cheese instead of gelatin. When whipping, start with chilled equipment and beat on medium-low speed until thickened like melted ice cream before adding sugar. Avoid overbeating, which transforms cream into butter.
3. Red velvet cake with strawberries on top
For dramatic presentation, pipe a ring of strawberry buttercream around each cake layer’s perimeter before adding strawberry jam and mousse. This creates a barrier preventing filling from seeping out. Position strawberry halves vertically against the cake’s outer edge, creating a crown effect when sliced. Alternatively, arrange whole strawberries between layers with their tops exposed for visual impact.
4. Garnishing with fresh strawberries
Fresh strawberries add vibrant color and flavor contrast. Select firm berries with vibrant red color throughout and fresh green tops. For professional shine, brush berries with warmed strawberry glaze. When decorating with strawberry halves, leave green tops intact for elegant presentation. Pipe large frosting rosettes, then strategically place halved strawberries between them for a bakery-worthy finish.
Common Mistakes and How to Avoid Them
Even the most experienced bakers encounter challenges when creating red velvet with strawberries desserts. Recognizing these potential pitfalls ahead of time can save you from disappointment and wasted ingredients.
Overmixing the batter
The moment liquid ingredients meet flour, gluten development begins. For cakes, particularly red velvet, overmixing activates excessive gluten, resulting in tough, dense texture rather than tender crumb. Once you add dry ingredients, switch your mixer to low speed and stop when flour streaks disappear. For cookies and cakes, add flour all at once rather than in batches to minimize mixing time. Remember that red velvet batters particularly suffer from overmixing because of their delicate balance of leavening agents.
Preventing cracks in cheesecake
Cracks in cheesecake often result from overmixing, overbaking, or rapid temperature changes. To prevent this:
- Beat room temperature cream cheese until smooth before adding other ingredients
- Mix eggs minimally—they hold air which can cause rising and cracking
- Use a water bath to create humidity and even heating
- Avoid opening the oven door during baking
- Cool gradually—turn off oven, crack door open, and leave cheesecake inside for about an hour
Above all, avoid overbaking—a properly baked cheesecake should have a 2-3 inch wobbly spot in the center.
Using the wrong pan size
Quality pans ensure even baking and proper rise. For cheesecake layers in a red velvet strawberry cake, bake the cheesecake in the same pan you’ll use for the cake layers to guarantee identical dimensions. Moreover, springform pans are essential for cheesecakes as they allow for easy removal without damage.
Layer separation issues
Essentially, layers slide because fillings create slippery surfaces. To prevent this:
- Apply a thin layer of buttercream before adding jam or mousse layers
- Chill cake layers before assembly to help set frosting faster
- Reduce filling amounts between layers
- Create a dam of frosting around layer edges to contain fillings
Strawberry topping too runny
A runny strawberry topping ruins presentation and texture. For a properly thickened sauce, add 1-2 tablespoons cornstarch while cooking. Simmer until visibly thickened, noting that sauce continues thickening as it cools. Refrigerate before using on your red velvet with strawberries creation. For strawberry mousse layers, ensure gelatin is fully incorporated but not hot when adding to prevent lumps.
Conclusion
After mastering the techniques shared throughout this guide, you’ll create a red velvet with strawberries dessert that rivals professional bakeries. Choosing quality ingredients stands as the foundation of success – from authentic buttermilk and natural cocoa powder to perfectly ripe, fragrant strawberries. The delicate balance between these elements creates that signature red velvet experience everyone craves.
Though this dessert requires time and attention to detail, the results certainly justify the effort. The combination of velvety cake, creamy cheese layers, and fresh strawberry components creates an unforgettable sensory experience. Remember that patience plays a crucial role during each step, especially when cooling your cheesecake properly or applying stabilized whipped cream.
While the process might seem intimidating at first, breaking it down into manageable steps makes this spectacular dessert achievable for bakers at any skill level. The techniques you’ve learned – from creating water baths to preventing layer separation – apply to countless other desserts as well.
Most importantly, don’t worry if your first attempt isn’t picture-perfect. Each time you prepare this red velvet with strawberries masterpiece, you’ll gain confidence and expertise. The joy on your guests’ faces when they taste this iconic flavor combination will make any initial challenges worthwhile. Armed with this knowledge, you can confidently create a show-stopping dessert that celebrates the timeless marriage of red velvet and strawberries – a true classic reinvented for your table.
FAQs
Q1. How do red velvet and strawberries complement each other in desserts? Red velvet and strawberries create a delightful flavor combination. The subtle chocolate taste of red velvet pairs beautifully with the fresh, sweet-tart flavor of strawberries, resulting in a crowd-pleasing dessert that balances richness with fruity brightness.
Q2. What’s the best way to store a cake with fresh strawberries? For cakes with fresh strawberries, refrigeration is key. Cover the cake and store it in the refrigerator, where it can stay fresh for up to 7 days. Avoid leaving it at room temperature for more than an hour, as the frosting can soften quickly.
Q3. What are some tips for making the perfect red velvet cake? To achieve the best red velvet cake, use Dutch-processed cocoa powder and gel food coloring for intense color. Weigh dry ingredients for accuracy, avoid overmixing the batter, and be careful not to overbake. Allow the cakes to cool completely before frosting for the best texture and appearance.
Q4. How long does a red velvet cake stay fresh? A store-bought red velvet cake, once opened, is best consumed within 1-2 days at room temperature or within a week if refrigerated. Homemade red velvet cakes without preservatives should ideally be eaten within 3-4 days when stored in the refrigerator.
Q5. What’s the secret to preventing cracks in a red velvet cheesecake? To prevent cracks in a red velvet cheesecake, ensure ingredients are at room temperature, avoid overmixing (especially after adding eggs), use a water bath for even baking, and cool the cheesecake gradually in the oven. Also, avoid overbaking – a properly baked cheesecake should have a slight wobble in the center.