Perfect Creamy Garlic Chicken: A Chef’s Secret Recipe Guide
Creamy garlic chicken has become one of the most sought-after dinner recipes, with our version garnering over 27 million views across social media platforms. I developed this single-skillet wonder specifically for those evenings when you want something impressive without spending hours in the kitchen. Ready in just 30 minutes, this dish strikes the perfect balance between convenience and restaurant-quality flavor.
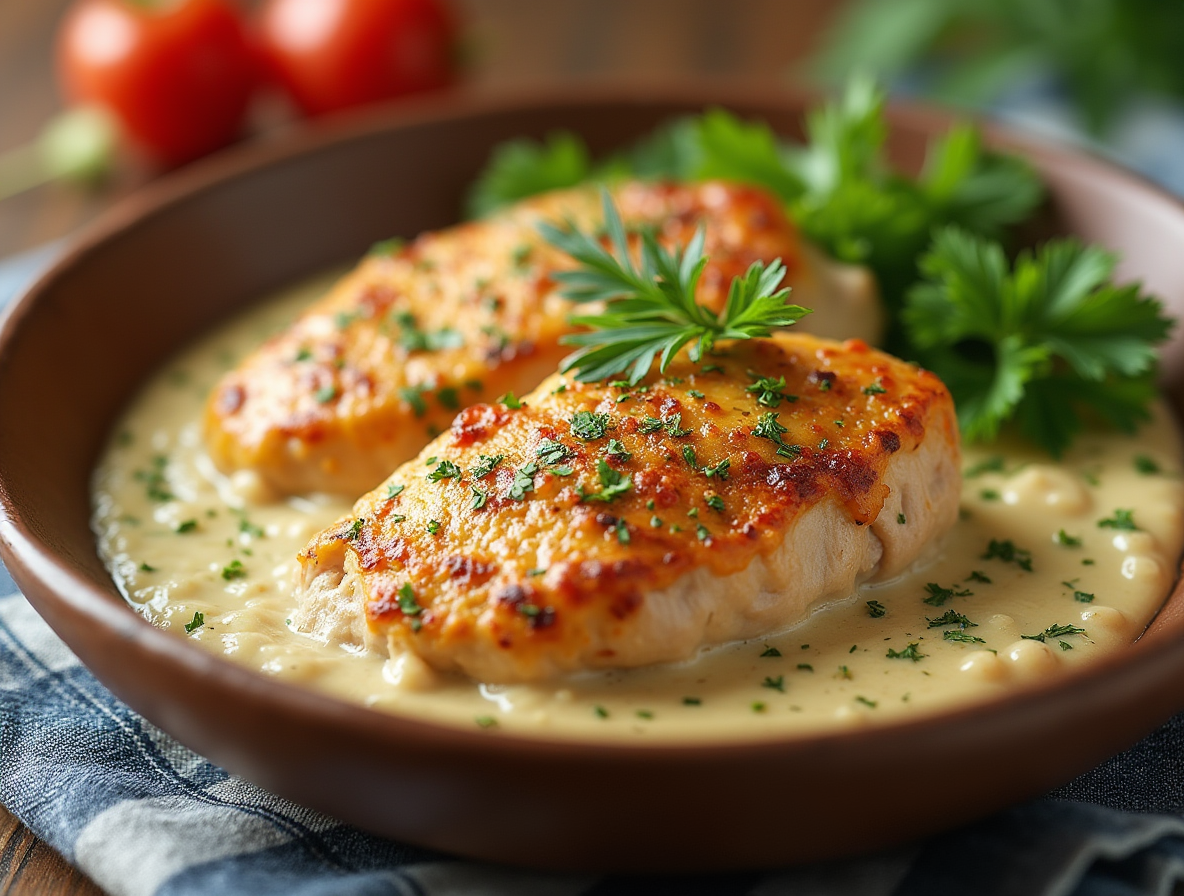
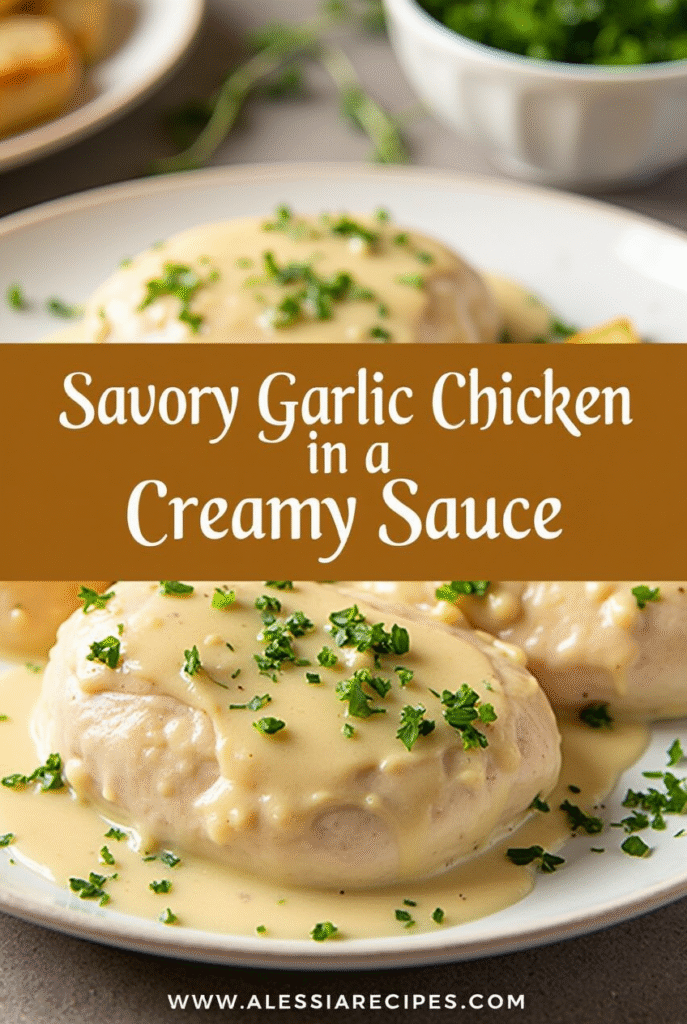
What makes this garlic chicken recipe truly special is the rich, velvety sauce that coats each tender piece of chicken. We use an entire head of garlic, which certainly sounds intense, but trust me—the cloves mellow beautifully during cooking, creating a creamy garlic sauce for chicken that’s flavorful without being overpowering. Moreover, this easy creamy garlic chicken pairs wonderfully with various sides like mashed potatoes, rice, or pasta, making it incredibly versatile for any occasion. In fact, I often prepare this creamy chicken sauce when entertaining guests who are always amazed that something so delicious can be prepared so quickly.
Essential Ingredients and Tools
The foundation of a perfect creamy garlic chicken lies in selecting the right ingredients and having proper tools at hand. Let’s explore what makes this dish extraordinary and how you can achieve restaurant-quality results at home.
Chicken cuts: breasts vs. thighs
Choosing between chicken breasts and thighs significantly impacts the final result of your creamy garlic chicken. Boneless, skinless chicken breasts create a leaner version of the dish, though they require careful cooking to prevent dryness. For best results, split larger breasts in half lengthwise to create thinner pieces that cook more quickly and evenly.
Alternatively, boneless skinless thighs offer a juicier, more forgiving option that many chefs prefer. Thighs contain more fat, which translates to richer pan drippings that enhance your sauce. Additionally, they’re typically more affordable. Nevertheless, remember that thighs require slightly longer cooking times—about 6-8 minutes until golden and cooked through compared to breasts.
Garlic: fresh cloves vs. minced
For an authentic creamy garlic chicken recipe, fresh garlic cloves are non-negotiable. Most recipes call for an entire head of garlic, which might seem excessive yet creates a mellowed, complex flavor after cooking. Fresh cloves can be left whole, halved, or sliced rather than minced, which helps prevent the garlic flavor from becoming overwhelmingly strong.
Pre-minced garlic from jars simply doesn’t deliver the same results. Furthermore, if you prefer a milder garlic presence, use whole cloves instead of slicing them—you’ll still get wonderful flavor without intensity. A silicone garlic peeler tube can speed up preparation if peeling multiple cloves feels tedious.
Cream and cheese: what works best
Heavy whipping cream forms the backbone of any creamy garlic sauce for chicken. Chefs strongly advise against substituting with lower-fat alternatives. Half-and-half or milk tends to curdle under high heat and won’t thicken properly without additional thickeners.
For cheese, freshly grated Parmesan melts beautifully into the sauce, creating richness and depth. You might also incorporate cream cheese for extra creaminess. If your sauce seems too thin, a cornstarch slurry (1-2 teaspoons cornstarch mixed with equal parts cold water) works perfectly to thicken it.
Recommended kitchen tools
Essential equipment for preparing easy creamy garlic chicken includes:
- A good quality 10-12 inch skillet (cast iron works wonderfully)
- Tongs for flipping chicken without piercing it
- An instant-read meat thermometer to ensure chicken reaches the safe temperature of 165°F
- A sharp chef’s knife for cutting chicken and slicing garlic
- Silicone garlic peeler (optional but helpful)
With these ingredients and tools ready, you’re fully equipped to create a spectacular creamy garlic chicken that rivals any restaurant version.
Step-by-Step: How to Make Creamy Garlic Chicken
Transforming simple ingredients into restaurant-quality creamy garlic chicken requires technique and timing. Once you master these steps, this dish will become a regular in your dinner rotation.
1. Prepping and seasoning the chicken
Begin by slicing chicken breasts in half horizontally to create thinner cutlets. Alternatively, pound them to an even ¼-inch thickness using a meat mallet. This ensures even cooking and tender results. Pat the chicken dry with paper towels—this is essential for proper browning.
Season both sides generously with salt, pepper, and Italian seasoning. For extra flavor, add garlic powder or onion powder. Next, lightly coat the chicken in flour mixed with a bit of grated Parmesan cheese, pressing gently to ensure even coverage.
2. Searing for a golden crust
Heat a large skillet over medium-high heat and add olive oil or clarified butter. Once hot, place the chicken in the pan without overcrowding—this might require cooking in batches. Cook undisturbed for 4-5 minutes per side until golden brown.
Pro tip: If the chicken sticks to the pan, it’s not ready to flip yet. It will release naturally once properly seared.
3. Making the creamy garlic sauce
After removing the chicken, add butter to the same pan and reduce heat to medium. Add whole or lightly crushed garlic cloves (6-8 for intense flavor) and sauté for 3-4 minutes until golden and fragrant—never burnt.
Subsequently, add 1-2 teaspoons flour, stirring constantly for about a minute. Slowly pour in chicken stock while whisking to prevent lumps. Once bubbly, add heavy cream and seasonings like thyme or parsley.
4. Combining and simmering
Return the chicken to the pan, nestling pieces into the sauce. Reduce heat to a gentle simmer and cover. Allow everything to cook together for 5-10 minutes until the chicken reaches 165°F internally and the sauce thickens.
Occasionally spoon sauce over the chicken during this process to maximize flavor absorption.
5. Final garnishing and plating
Prior to serving, taste the sauce and adjust seasonings as needed. A squeeze of fresh lemon juice can brighten the entire dish. Garnish with freshly chopped parsley or thyme sprigs.
Serve immediately with the sauce generously spooned over the chicken. This creamy garlic chicken pairs wonderfully with crusty bread to soak up the delicious sauce.
Pro Tips for Perfect Results
Mastering the perfect creamy garlic chicken requires attention to details that many home cooks overlook. These professional insights will elevate your dish from good to extraordinary.
How to avoid overcooking the chicken
The cardinal rule of juicy chicken is precision cooking. Use a meat thermometer to achieve the ideal internal temperature—165°F for chicken breasts and 170°F for juicier thighs. If your chicken starts browning too quickly before it’s cooked through, simply lower the heat to finish cooking. Additionally, after cooking, let your chicken rest for 5-10 minutes for breasts or 15-20 minutes for whole birds to allow moisture to redistribute throughout the meat.
Getting the sauce consistency right
A perfect creamy garlic sauce should coat the back of a spoon without being overly thick or runny. If your sauce needs thickening, create a cornstarch slurry by mixing 1-2 teaspoons of cornstarch with equal parts cold water, then stir into the simmering sauce. Alternatively, for a richer approach, make a proper roux by cooking flour with butter before adding liquids. Always remember—low heat prevents cream from curdling or separating in your sauce.
Flavor boosters: bouillon, mustard, lemon
Transform your creamy garlic chicken with strategic flavor enhancers. Better Than Bouillon paste offers concentrated flavor with long shelf life—both chicken and roasted garlic varieties work beautifully. For unexpected depth, add a teaspoon each of Worcestershire sauce, honey, and hot sauce to your broth mixture. A squeeze of fresh lemon brightens the entire dish without overwhelming it, meanwhile a touch of Dijon mustard helps emulsify the sauce for silky smoothness.
Common mistakes to avoid
Even experienced cooks make these common errors: overcrowding the pan (cook in batches instead), skipping the deglazing step (those browned bits are flavor gold!), and shocking cream with high heat (which causes separation). Remember that garlic burns easily—cook it until fragrant but not deeply browned to avoid bitterness. Finally, when reheating leftovers, do so gently with a splash of broth to restore the sauce’s original consistency without splitting.
Serving, Storing, and Reheating
The joy of making creamy garlic chicken extends beyond the cooking process to serving it with complementary sides and knowing how to handle leftovers. Properly storing and reheating ensures this delicious dish maintains its creamy texture and rich flavor even days after preparation.
Best sides to serve with garlic chicken
Creamy garlic chicken pairs wonderfully with starchy sides that help soak up the delicious sauce. Mashed potatoes create a perfect bed for the chicken and sauce, allowing every bit of flavor to be enjoyed. Alternatively, pasta, rice, or risotto work exceptionally well as bases for this rich dish.
For vegetables, roasted green beans offer a crisp contrast to the creamy sauce. Steamed broccoli, roasted cauliflower, or maple-roasted beets and carrots provide colorful, nutritious accompaniments. Fresh salads like Parmesan arugula or Caesar add a refreshing element that balances the richness of the creamy garlic sauce.
Don’t forget crusty bread—ideal for soaking up every last drop of that sumptuous sauce!
How to store leftovers properly
Place cooled creamy garlic chicken in airtight containers to maintain freshness and prevent absorption of other flavors in your refrigerator. When properly stored, leftovers remain delicious for 3-4 days in the refrigerator.
Always allow the chicken to cool completely before refrigerating to prevent condensation, which can make the sauce watery upon reheating.
Reheating without splitting the sauce
To reheat in the microwave, use medium power in 30-second intervals, stirring between each interval until warmed through (approximately 1-2 minutes total). This gentle approach helps prevent sauce separation.
On the stovetop, reheat over low heat in a covered pan, adding a splash of chicken broth or cream if the sauce seems too thick. Stir occasionally and heat until the internal temperature reaches 165°F.
For oven reheating, place in a covered baking dish at 350°F for 20-25 minutes. Adding a tablespoon of water or broth helps maintain moisture.
Can you freeze creamy garlic chicken?
Opinions differ regarding freezing creamy garlic chicken. Some sources advise against freezing cream-based dishes since dairy products tend to separate and become grainy when thawed. However, others suggest it can be frozen for up to 3-4 months if properly prepared.
If freezing, ensure the chicken is completely cooled, then store in freezer-safe containers. When ready to use, thaw overnight in the refrigerator rather than using quick-thaw methods. Upon reheating, you may need to add fresh cream while stirring to help reconstitute the sauce’s original texture.
Conclusion
Mastering this creamy garlic chicken recipe will undoubtedly transform your weeknight dinner routine. Throughout this guide, we’ve explored how simple ingredients like chicken, garlic, and cream combine to create something truly special. The beauty of this dish lies not only in its rich flavor but also in its versatility and ease of preparation.
After cooking this dish countless times, I can assure you that attention to detail makes all the difference. Properly searing the chicken creates that golden crust, while gently cooking the garlic develops depth without bitterness. Additionally, the right cream-to-stock ratio ensures a sauce that clings perfectly to each bite.
This recipe has become my go-to when time is limited but impressions matter. Your friends and family will surely ask for seconds, wondering how you created such restaurant-quality food at home. Before long, you’ll find yourself adapting the recipe to your preferences—perhaps adding herbs you love or adjusting the garlic intensity to suit your taste.
Remember, cooking should bring joy rather than stress. This single-skillet wonder certainly delivers on that promise. Though it tastes complex, the process remains straightforward. Therefore, whether you’re cooking for a special occasion or simply craving comfort food on a Tuesday night, this creamy garlic chicken stands ready to delight your taste buds.
Give this recipe a try tonight—I’m confident it will earn a permanent spot in your culinary repertoire!
FAQs
Q1. How long does it take to make creamy garlic chicken? This delicious dish can be prepared in about 30 minutes, making it perfect for busy weeknight dinners or quick entertaining.
Q2. What type of chicken is best for this recipe? Both boneless, skinless chicken breasts and thighs work well. Breasts offer a leaner option, while thighs provide more flavor and are more forgiving during cooking.
Q3. Can I use pre-minced garlic instead of fresh cloves? Fresh garlic cloves are highly recommended for the best flavor. Pre-minced garlic from jars doesn’t deliver the same results and may overpower the dish.
Q4. What’s the secret to a perfectly creamy sauce? Use heavy whipping cream and avoid lower-fat alternatives. If needed, thicken the sauce with a cornstarch slurry or by making a proper roux with flour and butter.
Q5. How should I store and reheat leftovers? Store cooled leftovers in airtight containers in the refrigerator for 3-4 days. Reheat gently on the stovetop or in the microwave, adding a splash of broth or cream if needed to maintain the sauce’s consistency.