How to Make The Perfect Pineapple Dream Dessert (No Baking!)
Pineapple dream dessert has been one of my family’s favorites for years. This creamy, fluffy treat is an oldie but goodie that always disappears quickly at gatherings and rarely has any leftovers. If you’re looking for the perfect summer dessert that doesn’t require turning on your oven, you’ve found it!
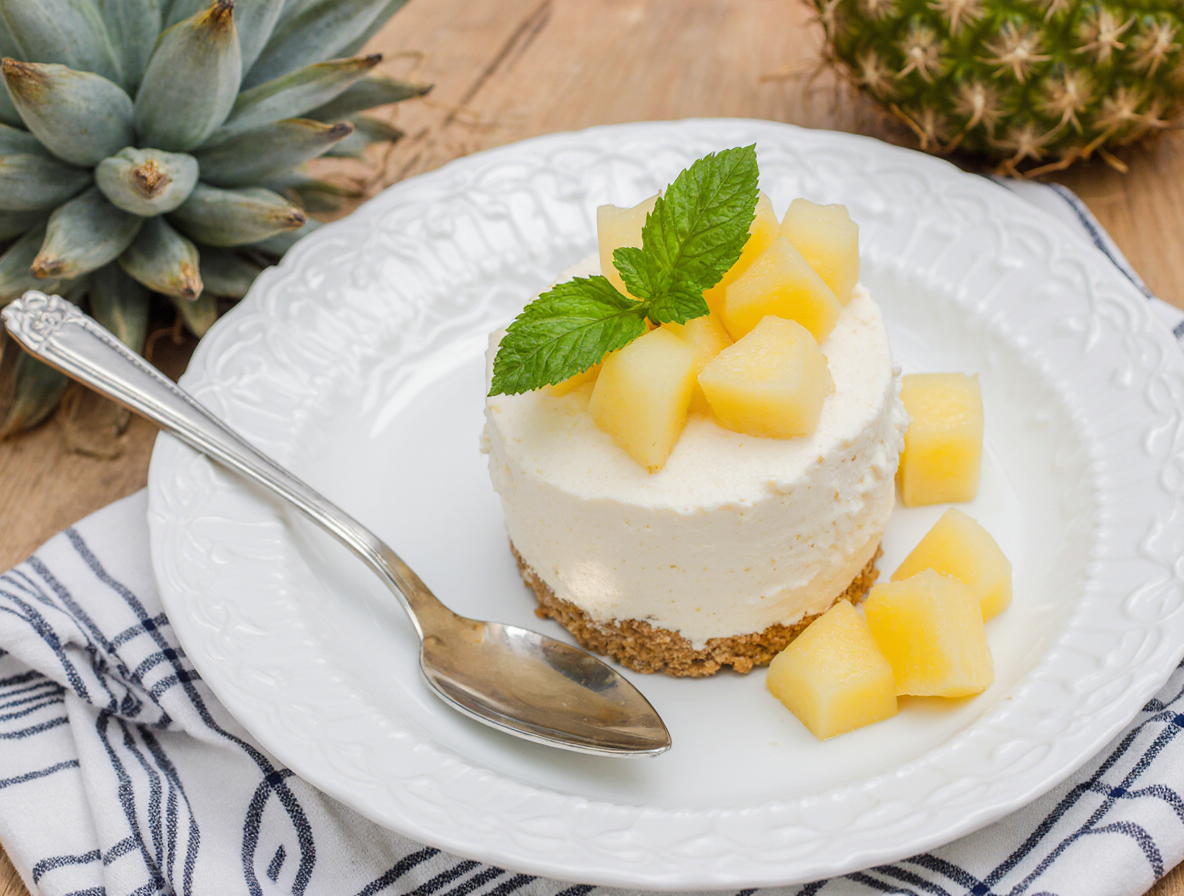
This no-bake pineapple cream dessert features a buttery graham cracker crust topped with a luscious pineapple-flavored cheesecake filling. Originally called Pineapple Dream Torte, this easy pineapple dream dessert has evolved into a beloved classic that’s especially popular during hot summer months when baking isn’t ideal. What’s more, a single 8×8-inch dish can be cut into 12-15 pieces, making it perfect for serving at parties.
In this guide, I’ll walk you through everything you need to know to create this delightful no-bake dessert. From selecting the right ingredients to assembling the layers correctly, you’ll soon be enjoying this cool, creamy pineapple treat that’s sure to become a staple in your dessert rotation.
Choosing the Right Ingredients for Pineapple Dream Dessert
The quality of ingredients makes all the difference in creating a perfect pineapple dream dessert. Let’s explore what you’ll need for each layer of this no-bake delight.
Crust essentials: graham crackers and butter
For the foundation of your dessert, you’ll need about 2½ cups of graham cracker crumbs (approximately 2 sleeves) and ½ cup of unsalted butter. Always use real butter rather than margarine—it creates a sturdier, more flavorful base. To achieve the most uniform crumbs, a food processor works wonderfully, although placing crackers in a sealed bag and crushing with a rolling pin is also effective. After mixing your crumbs with melted butter, press firmly into your pan using the bottom of a measuring cup for even compaction.
Filling ingredients: cream cheese, powdered sugar, whipped topping
The creamy middle layer requires 4 ounces of cream cheese (half a block), 2 cups of powdered sugar, and an 8-ounce container of whipped topping like Cool Whip. It’s crucial that your cream cheese is fully softened to room temperature; otherwise, you’ll end up with lumps that can’t be smoothed out. Additionally, powdered sugar is preferable to granulated as it dissolves completely, creating a silky texture without graininess.
Topping options: pineapple chunks, coconut, or nuts
While crushed pineapple is folded into the filling, you can enhance the top layer with pineapple chunks, shredded coconut, or chopped walnuts. These additions not only look attractive but also provide textural contrast to the creamy filling. Furthermore, toasted coconut flakes bring a lovely visual finish and subtle crunch to this tropical-inspired dessert.
Fresh vs canned pineapple: what works best
Although fresh pineapple might seem like the premium choice, canned pineapple actually works better in this recipe. The heat involved in the canning process inactivates the bromelain enzymes present in fresh pineapple that can otherwise break down proteins and affect texture. Moreover, canned pineapple offers consistent sweetness and juiciness, making your dessert reliably delicious every time. Just remember to drain it thoroughly to prevent a soggy outcome.
Low-fat and sugar-free alternatives
For a lighter version, consider using Neufchatel cheese (low-fat cream cheese) and light whipped topping. Regarding sweeteners, some bakers have successfully substituted Swerve powdered sugar in a 1:1 ratio for traditional powdered sugar. Likewise, sugar-free vanilla pudding mix can replace regular pudding in modified versions of this recipe, creating a dessert that’s still indulgent yet accommodates dietary preferences.
Step-by-Step Guide to Making the Dessert
Creating this refreshing no-bake dessert is straightforward once you understand the key steps. Let me guide you through the entire process from crust to chilling.
1. Preparing the crust layer
To begin with, crush graham crackers into fine crumbs using a food processor or place them in a ziplock bag and crush with a rolling pin. In a medium bowl, combine 2½ cups of graham cracker crumbs with ½ cup melted butter and 1-2 tablespoons of sugar until the mixture resembles wet sand. Reserve about ¼ cup of crumbs for topping, then firmly press the remaining mixture into the bottom of an 8×8 or 9×9 inch pan using the flat bottom of a measuring cup for even compaction.
2. Mixing the cream cheese filling
Before proceeding, ensure your cream cheese (4 oz or half a block) is properly softened. Beat it using an electric mixer for 2-3 minutes until light and fluffy. Subsequently, add 1-2 cups of powdered sugar gradually and continue beating until completely incorporated and smooth. At this point, the mixture should have a creamy, spreadable consistency without any lumps.
3. Folding in the pineapple
Proper drainage is crucial for this step. Place crushed pineapple in a strainer and press gently to remove excess juice. After draining thoroughly, fold a heaping tablespoon of crushed pineapple directly into the cream cheese mixture using a rubber spatula. This initial amount adds flavor to the base layer without making it too wet.
4. Assembling the layers
Once the crust has cooled completely, spread the cream cheese mixture evenly over it. Next, fold the remaining drained pineapple into the whipped topping until well combined. Carefully spread this pineapple-whipped topping mixture as the final layer. For the finishing touch, sprinkle the reserved graham cracker crumbs over the top.
5. Chilling for best results
Cover the dessert with plastic wrap or foil and refrigerate for a minimum of 4 hours, though overnight chilling yields the best texture and flavor. This resting period allows all the layers to set properly and the flavors to meld together. Under no circumstances should you rush this step, as proper setting is essential for clean slices and optimal taste.
Tips to Perfect Your No Bake Pineapple Cream Dessert
Getting the details right makes all the difference between an ordinary pineapple dessert and a spectacular one. These expert tips will help you perfect your no-bake pineapple dream dessert every time.
How to drain pineapple properly
Proper draining is crucial for a perfect pineapple dream dessert. Pour your crushed pineapple into a fine-mesh strainer and press firmly with the back of a spoon to extract all excess juice. For even better results, use paper towels to blot and dab the pineapple after straining. This thorough draining prevents excess moisture that could make your filling watery or cause your dessert not to set properly.
Avoiding a soggy crust
Nobody wants a soggy bottom on their pineapple dream dessert! First, ensure your crust is completely cool before adding any filling. For extra protection, consider brushing the inside of your graham cracker crust with a thin layer of melted chocolate to create a waterproof barrier between crust and filling. Alternatively, brush the crust with lightly beaten egg white and bake at 350°F for 3-5 minutes to create a moisture-resistant seal.
Using homemade whipped cream vs Cool Whip
Cool Whip contains stabilizers that help it maintain shape and consistency, making it ideal for this dessert. However, you can substitute homemade whipped cream if preferred. For an 8-ounce tub of Cool Whip, use 1½ cups of cold heavy whipping cream. Remember that homemade whipped cream doesn’t stay stabilized as long, so consider adding Knox gelatin as a stabilizer if using fresh cream.
How long to chill before serving
Patience pays off with this dessert! While it’s technically safe to eat after about 2 hours, proper setting requires at least 4 hours of refrigeration. For truly exceptional results, chill overnight—this allows flavors to meld together perfectly and ensures proper texture. The dessert tastes significantly better after this longer chill time.
Making it ahead for parties
This pineapple dream dessert is naturally perfect for making ahead, since it requires chilling time anyway. It keeps well in the refrigerator for 3-4 days when tightly covered. For longer storage, you can freeze it for up to 3 months—simply wrap with plastic wrap then aluminum foil. To serve after freezing, thaw overnight in the refrigerator rather than at room temperature to maintain texture.
Creative Variations and Serving Ideas
One of the best things about this classic dessert is its versatility. Let me share some creative twists that will elevate your pineapple dream dessert experience!
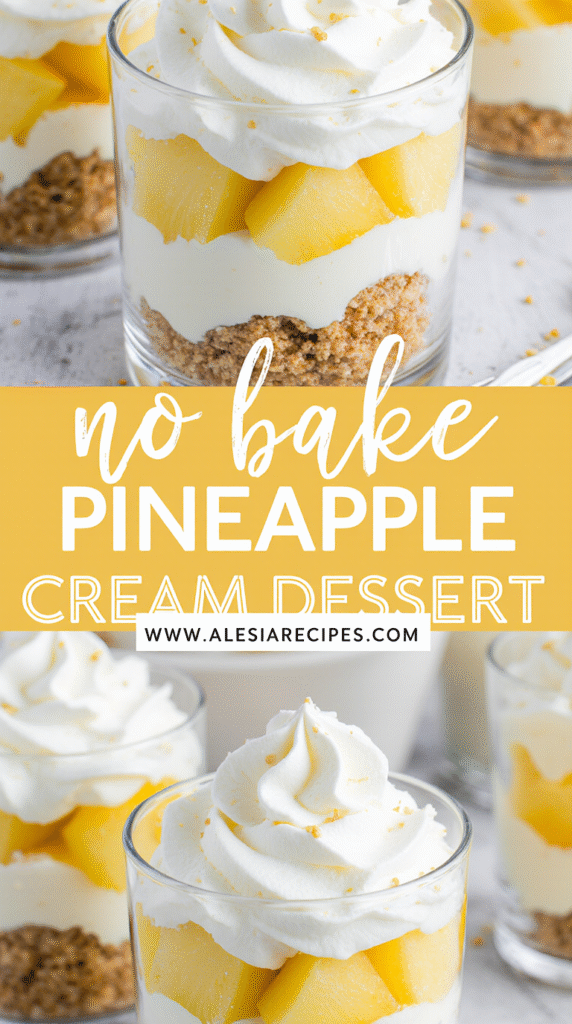
Turning it into parfaits or mini cups
Instead of making one large dessert, consider creating individual servings that look impressive yet require minimal effort. Use parfait glasses for an elegant presentation, layering the crust, cream cheese mixture, and topping for a beautiful visual effect. Alternatively, assemble in a large trifle bowl for family-style serving. For kid-friendly portions or parties, individual cupcake liners work perfectly—no baking required and they’re easier for little hands to hold.
Adding coconut, cherries, or nuts
To give your dessert a tropical twist, add shredded coconut directly into the filling or sprinkle it on top. For enhanced coconut flavor, consider substituting 1/2 teaspoon of coconut extract for vanilla in the whipping cream. Chopped pecans mixed into the filling add a delightful crunch, whereas maraschino cherries provide both color contrast and complementary flavor. Finally, toasted sliced almonds sprinkled on top offer texture and visual appeal.
Using different fruits like strawberries or peaches
Beyond pineapple, this versatile dessert welcomes other fruits beautifully. Strawberries create a dessert reminiscent of a strawberry shortcake. Crushed peaches or mangoes work wonderfully as pineapple substitutes. Mandarin oranges offer a citrus twist that tastes similar to an orange creamsicle. Even apricots can substitute in equal amounts as the crushed pineapple.
Making it gluten-free or keto-friendly
For gluten-free guests, use gluten-free graham crackers for the crust. Alternatively, serve the filling without the crust in crystal dishes. For keto adaptations, pineapple extract provides the tropical flavor without added sugar and carbs. Various low-carb sweeteners can replace powdered sugar—coconut stevia works particularly well for enhancing the tropical profile. Consider vanilla wafer crumbs or crushed Oreos as alternative crusts for different flavor profiles.
Conclusion
Pineapple dream dessert truly stands as one of the most delightful no-bake treats you can add to your recipe collection. Throughout this guide, we’ve seen how a few simple ingredients transform into a creamy, tropical delight that never fails to impress guests. Actually, the beauty of this dessert lies not just in its refreshing taste but also in its incredible versatility.
Remember that proper technique matters significantly when making this dessert. Thorough draining of pineapple prevents soggy results, while adequate chilling time allows flavors to meld perfectly. Similarly, pressing the crust firmly creates that perfect foundation for your creamy layers.
This dessert also welcomes personal touches based on your preferences. You might enjoy adding coconut for extra tropical flair or substituting other fruits like strawberries or peaches for variety. Additionally, the recipe adapts well to dietary needs with gluten-free or keto-friendly modifications available.
Summer gatherings certainly call for desserts that don’t require heating up your kitchen, and this pineapple dream fits that need perfectly. The fact that you can prepare it ahead of time makes it even more practical for busy hosts.
My family has enjoyed this dessert for years, and I’m confident yours will too. Whether served in a traditional square pan or dressed up as individual parfaits, this no-bake pineapple dream dessert promises cool, creamy satisfaction that keeps everyone coming back for more. Give it a try—you’ll soon discover why this retro dessert has remained a beloved favorite through generations!
FAQs
Q1. What are the main ingredients in a Pineapple Dream Dessert? A Pineapple Dream Dessert typically consists of a graham cracker crust, a creamy filling made with cream cheese, powdered sugar, and whipped topping, and crushed pineapple. The dessert is usually topped with additional graham cracker crumbs for added texture.
Q2. How long does the Pineapple Dream Dessert need to chill? For the best results, chill the Pineapple Dream Dessert for at least 4 hours, though overnight chilling is ideal. This allows the flavors to meld together perfectly and ensures the proper texture is achieved.
Q3. Can I use fresh pineapple instead of canned for this dessert? While fresh pineapple might seem like a good choice, canned pineapple actually works better in this recipe. Canned pineapple offers consistent sweetness and juiciness, and the canning process inactivates enzymes that could affect the dessert’s texture.
Q4. How can I prevent my Pineapple Dream Dessert from becoming soggy? To avoid a soggy dessert, make sure to drain the crushed pineapple thoroughly. Use a fine-mesh strainer and press firmly with the back of a spoon to extract excess juice. You can also blot the pineapple with paper towels for extra moisture removal.
Q5. Are there any variations I can try with this dessert? Absolutely! You can turn the dessert into individual parfaits or mini cups for easy serving. Try adding coconut, cherries, or nuts for extra flavor and texture. You can also experiment with different fruits like strawberries or peaches instead of pineapple for a twist on the classic recipe.