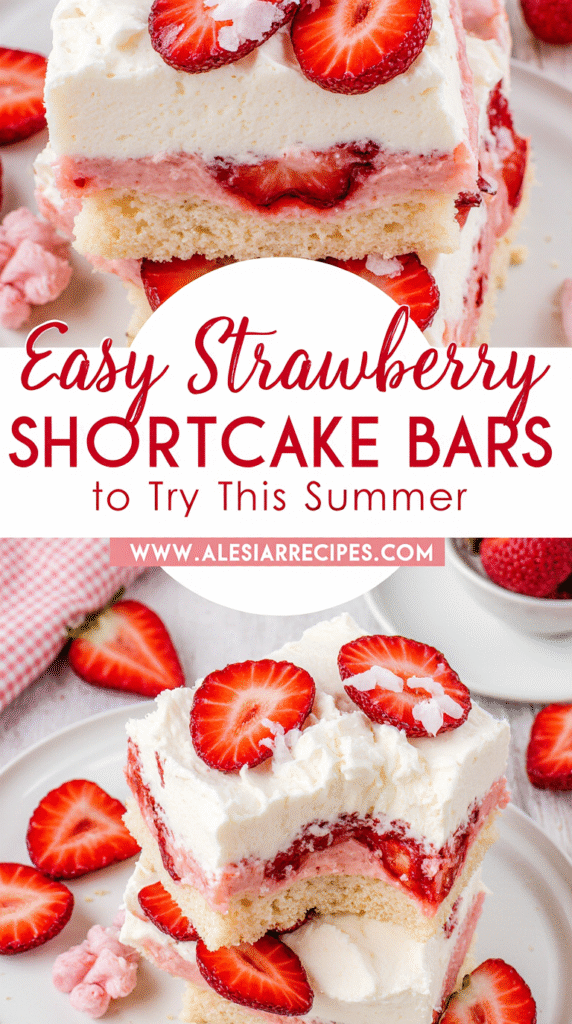
How to Make Perfect Strawberry Shortcake Bars: A Foolproof Summer Guide
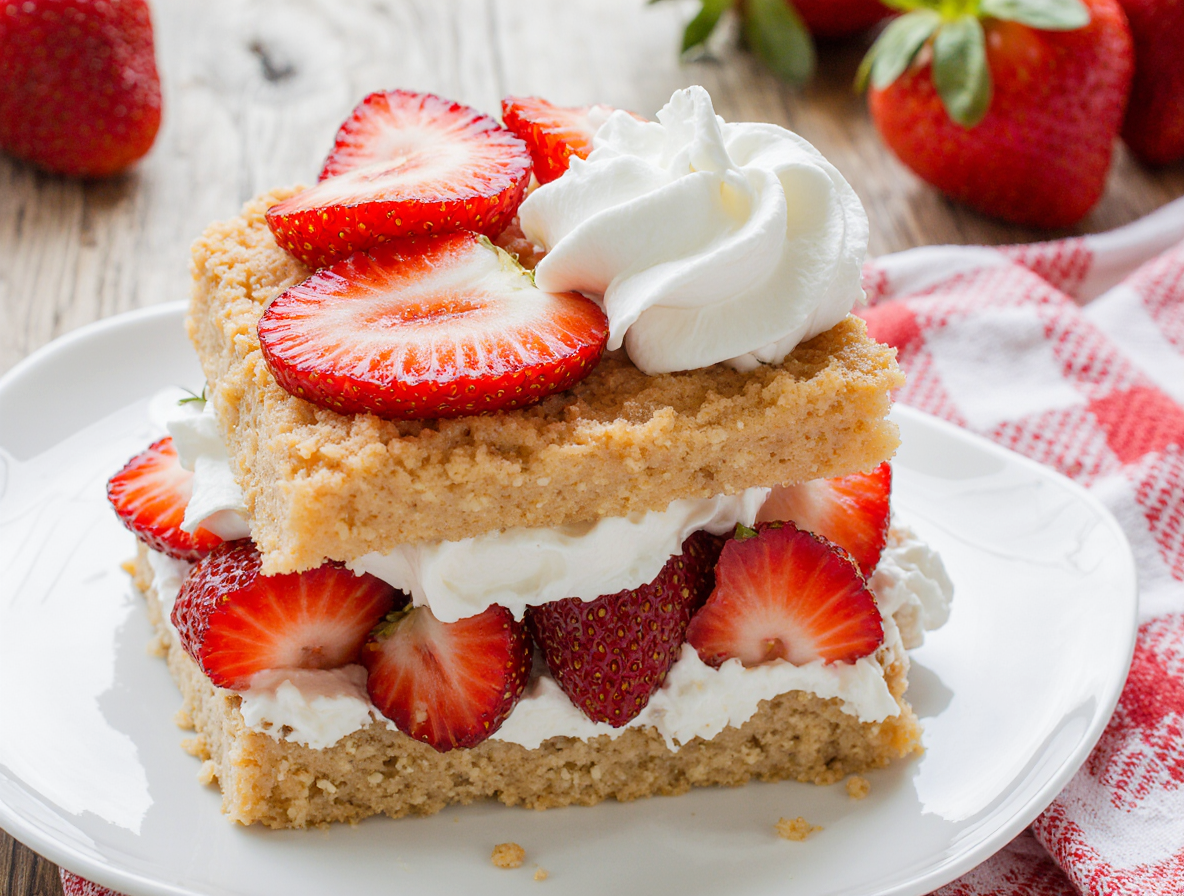
Strawberry shortcake bars scream summer with their juicy, fresh strawberries nestled between buttery, crumbly layers. I’ve found these treats to be incredibly easy to make—some versions require just five ingredients and don’t even need an ice cream maker!
With their perfect balance of sweetness from the cake and whipped cream against the slight tartness of strawberries, these strawberry dessert bars have earned their place as a warm-weather staple. The best part about this strawberry shortcake dessert bar recipe is its versatility—it’s ideal for picnics, potlucks, neighborhood BBQs, or simply as a refreshing treat during the warmer months. In this guide, I’ll walk you through everything you need to know to create these delightful bars, from selecting the freshest ingredients to troubleshooting common issues.
Choosing the Right Ingredients
The quality of your ingredients will make or break your strawberry shortcake bars. First and foremost, let’s look at what makes each component special and how to choose wisely.
Fresh vs. frozen strawberries
Fresh strawberries are undeniably the gold standard for strawberry shortcake bars. When using fresh berries, you’ll get a more vibrant flavor, better texture, and less moisture—all crucial for perfect bars. Fresh strawberries maintain their structure during baking, whereas frozen berries break down significantly because the freezing process damages their cell structure.
If you absolutely must use frozen strawberries, be prepared to make adjustments. Frozen berries release more liquid when baking, which can lead to soggy bars. To counter this, add an extra 1/4 teaspoon of thickener per cup of fruit. Additionally, rinse frozen berries in cold water until it runs clear to prevent color bleeding into your batter.
Best flour and sugar types
The type of flour dramatically impacts your strawberry shortcake bars’ texture. All-purpose flour works as a reliable workhorse for most recipes, but cake flour creates noticeably more tender bars because of its lower protein content. For the ultimate texture, consider using cake flour which produces a softer, more delicate crumb.
For sweetness, a combination of granulated and brown sugar often yields the best results. Brown sugar adds a butterscotch-like flavor note and moisture, while granulated sugar provides straightforward sweetness that lets the strawberry flavor shine. When measuring brown sugar, remember to pack it down in your measuring cup for accuracy.
Butter vs. shortening
While both can be used interchangeably in a one-to-one swap, they produce different results. Butter contains 80% butterfat and 20% water, whereas shortening is 100% hydrogenated vegetable oil. Consequently, butter adds incomparable rich flavor but causes more spreading. Shortening creates higher, more structured bars that hold their shape better.
For the best strawberry shortcake bars, butter is typically preferred for its superior taste. However, in hot weather, consider using some shortening in your frosting to prevent melting.
Optional add-ins: nuts, oats, or lemon zest
A hint of lemon zest beautifully complements strawberries by brightening their flavor. Oats and almond flour can be incorporated for added texture and a slightly nutty flavor. Sliced almonds or coconut make excellent additions to the crumble topping. For a simple yet effective enhancement, just 2 teaspoons of lemon zest can transform your strawberry shortcake bars from good to exceptional.
Step-by-Step Strawberry Shortcake Bars Recipe
With your fresh ingredients assembled, it’s time to turn them into mouthwatering strawberry shortcake bars. This recipe breaks down into four straightforward stages that even novice bakers can master.
1. Make the crust and crumble topping
Start by preheating your oven to 325-350°F, depending on your recipe. For the perfect crust, combine 2 cups of flour with 1/4 cup of sugar in a large bowl. Next, add 1 cup of melted butter and stir until thoroughly combined. The mixture should have a soft dough consistency that holds together when pressed.
Reserve about 10-15% of this mixture for your crumble topping. For added texture, you can mix chopped almonds or oats into this reserved portion. Press the remaining dough evenly into a parchment-lined baking pan. Pre-bake the crust for 8-10 minutes until the edges show just a hint of light browning.
2. Prepare the strawberry filling
While the crust bakes, rinse and chop 1.5-2 cups of fresh strawberries. In a medium bowl, toss the strawberries with 1-2 tablespoons of lemon juice and optional lemon zest to brighten the flavor. For the perfect consistency, combine sugar with either cornstarch or tapioca flour in a separate bowl, then gently fold this mixture into the berries.
Allow the strawberry mixture to sit for approximately 10 minutes, then drain any excess juice to prevent soggy bars. This resting period helps the strawberries release their natural juices and absorb the sweetness.
3. Assemble and bake the bars
Once your crust has pre-baked and cooled slightly, spread the strawberry filling evenly over it. Take care to spread the mixture all the way to the edges for consistent flavor in every bite. Subsequently, sprinkle the reserved crumble mixture over the strawberry layer.
Return the pan to the oven and bake for 30-35 minutes until the filling bubbles at the edges and the crumble topping turns golden brown. Visual cues are crucial here—look for the strawberry juices bubbling about an inch from the edge of the pan.
4. Cool and glaze the bars
Allow the strawberry shortcake bars to cool completely in the pan before adding any glaze or frosting. For a simple yet elegant glaze, whisk together powdered sugar, cream, and a splash of vanilla until smooth. Drizzle this mixture over the cooled bars for a beautiful finish.
Alternatively, create a creamy topping by beating cream cheese with powdered sugar and vanilla, then folding in whipped cream. For best results, refrigerate the bars for at least 30 minutes after glazing to set the layers before cutting and serving.
Expert Tips for Perfect Strawberry Dessert Bars
Even with the best recipe in hand, certain techniques can elevate your strawberry shortcake bars from good to exceptional. These expert tips focus on critical details that many home bakers overlook but make all the difference in your final result.
Cool the butter before mixing
Using properly cooled butter creates the foundation for perfect strawberry shortcake bars. Notably, when working with melted butter, it should be cooled to lukewarm or room temperature to prevent a greasy crust or crumble. For recipes calling for solid butter, ensure it remains extra cold until mixing. This cold butter prevents premature melting in the oven that would otherwise result in greasy, flat bars instead of the crisp, structured dessert you’re aiming for. Furthermore, cold butter creates a crust with exceptional texture—crunchy exterior with rich butter flavor throughout.
Pre-bake the crust to avoid sogginess
Pre-baking (also called blind baking) is essential for strawberry dessert bars. This technique helps the crust remain crispy and firm rather than becoming soggy once the juicy strawberry filling is added. Importantly, allow your pre-baked crust to cool slightly before adding the strawberry filling on top. This cooling period creates a barrier that prevents moisture from the filling from immediately soaking into your perfectly crisp base. The result? Bars that maintain their structural integrity and are much easier to cut and serve.
Let bars cool completely before slicing
Patience truly pays off with strawberry shortcake bars. Although tempting to cut into them while warm, allowing your bars to cool completely at room temperature (about 1-2 hours) is crucial. Some recipes specifically recommend waiting at least 4 hours before cutting. Without adequate cooling time, the bars will fall apart when sliced. In fact, many professional bakers recommend setting a timer to avoid cutting too soon—the cooling period allows the filling to set properly and the crust to firm up for clean, photo-worthy slices.
Chill before serving for best texture
For truly impressive strawberry shortcake bars, refrigeration is the final essential step. Chilling for at least 1-2 hours after cooling at room temperature makes cutting significantly easier and cleaner. Some recipes recommend up to 3 hours of refrigeration for optimal results. Additionally, refrigerated bars hold up better over time since strawberries naturally retain water that can make room-temperature bars become soggy after a few days. For the cleanest cuts, use a sharp knife and wipe it clean between slices.
Common Questions and Troubleshooting
Questions always pop up when making strawberry shortcake bars, especially for first-time bakers. Let me address the most common concerns to help you troubleshoot any issues along the way.
Can I use other berries?
Certainly! Strawberry shortcake bars are wonderfully versatile. You can easily substitute or combine other fruits with your strawberries. Blueberries, raspberries, and blackberries all make excellent alternatives. For a unique twist, try mixing strawberries with kiwi or rhubarb. Many bakers report that strawberry-blueberry is an exceptionally sweet combination.
Beyond berries, these bars work beautifully with stone fruits like peaches, apricots, cherries, or even tropical options such as pineapple or kiwi. First thing to remember, the recipe stays essentially the same regardless of which fruit you choose—just swap in equal amounts of your preferred fruit.
How do I know when the bars are done?
The most reliable indicators that your strawberry shortcake bars are finished baking include: the center should not jiggle when gently shaken, the strawberry filling should be bubbling around the edges, and the crumble topping should be golden brown. Generally, this takes about 30-40 minutes of baking time.
If you notice the top getting too dark before the bars are fully baked, carefully place a piece of foil over them and continue baking. This prevents burning while allowing the filling to finish cooking. In reality, visual cues are more reliable than strict timing—look for that golden color and bubbling filling as your primary indicators.
Can I make these ahead of time?
Absolutely! Strawberry shortcake bars are perfect for preparing in advance. You can make them up to 1-2 days ahead and store them in the refrigerator[203]. For longer storage, these bars freeze beautifully for up to 3 months.
To ensure perfect presentation, consider adding fresh strawberries right before serving if your recipe calls for them as a topping, as the juice from the berries can tint cream layers pink over time. Moreover, allowing the bars to come to room temperature about 30 minutes before serving enhances their flavor and texture.
What if my glaze is too thick or thin?
Glaze consistency problems are easily fixed. If your strawberry glaze is too thick, add a few drops of water, lemon juice, or your chosen liquid at a time until you reach the desired consistency[214]. For glaze that’s too thin, incorporate additional powdered sugar gradually, about one tablespoon at a time, until it thickens appropriately.
The perfect glaze should be thick enough to coat the back of a spoon yet thin enough to run off easily. Given these points, remember that homemade glaze is remarkably forgiving—you can always adjust as needed.
Conclusion
Strawberry shortcake bars truly stand as the perfect summer dessert for any occasion. Throughout this guide, we’ve explored everything from selecting the freshest ingredients to mastering the techniques that elevate these treats from good to exceptional. Fresh strawberries undoubtedly create the best results, though you can certainly experiment with other berries or fruits for delightful variations.
The process might seem detailed at first glance, but breaking it down into manageable steps makes these bars accessible even for beginner bakers. Remember that patience plays a crucial role—allowing proper cooling time and chilling before serving will reward you with picture-perfect slices and ideal texture.
Most importantly, these versatile treats adapt to your schedule and preferences. You can prepare them ahead for gatherings, adjust the glaze consistency as needed, or customize with various add-ins like lemon zest or nuts. The combination of buttery crust, juicy strawberry filling, and sweet topping creates a balanced dessert that captures summer’s essence in every bite.
After mastering this recipe, you’ll likely find yourself reaching for it repeatedly throughout the warmer months. These strawberry shortcake bars have become my go-to dessert for everything from casual family dinners to neighborhood potlucks, never failing to earn compliments and recipe requests. Therefore, gather your ingredients, follow these foolproof steps, and get ready to enjoy a true taste of summer!
FAQs
Q1. What are the key ingredients for strawberry shortcake bars? The main ingredients include fresh strawberries, flour, sugar, butter, and heavy cream. You can also add lemon zest for extra flavor. For the crust and crumble topping, you’ll need flour, sugar, and melted butter. The filling consists of fresh strawberries, lemon juice, and a sugar-cornstarch mixture.
Q2. How can I prevent my strawberry shortcake bars from becoming soggy? To avoid soggy bars, pre-bake the crust for 8-10 minutes before adding the filling. Allow the pre-baked crust to cool slightly before adding the strawberry mixture. Also, drain excess juice from the strawberry filling before spreading it on the crust. Finally, let the bars cool completely before glazing and refrigerate for at least 30 minutes before serving.
Q3. Can I use other fruits instead of strawberries in this recipe? Absolutely! While strawberries are traditional, you can easily substitute or combine other fruits. Blueberries, raspberries, blackberries, peaches, or even tropical fruits like pineapple work well. Simply swap in an equal amount of your preferred fruit. Mixing strawberries with other fruits, like blueberries or kiwi, can create unique and delicious flavor combinations.
Q4. How do I know when my strawberry shortcake bars are done baking? Your bars are done when the center doesn’t jiggle when gently shaken, the strawberry filling is bubbling around the edges, and the crumble topping has turned golden brown. This typically takes about 30-40 minutes of baking time. If the top is browning too quickly, cover it with foil and continue baking until the filling is fully cooked.
Q5. Can I make strawberry shortcake bars ahead of time? Yes, these bars are perfect for making in advance. You can prepare them 1-2 days ahead and store them in the refrigerator. For longer storage, they can be frozen for up to 3 months. If your recipe includes fresh strawberries as a topping, consider adding those just before serving to maintain their freshness. Allow refrigerated bars to come to room temperature for about 30 minutes before serving for the best flavor and texture.