How to Make Perfect Peach Squares: A Foolproof Summer Dessert Guide

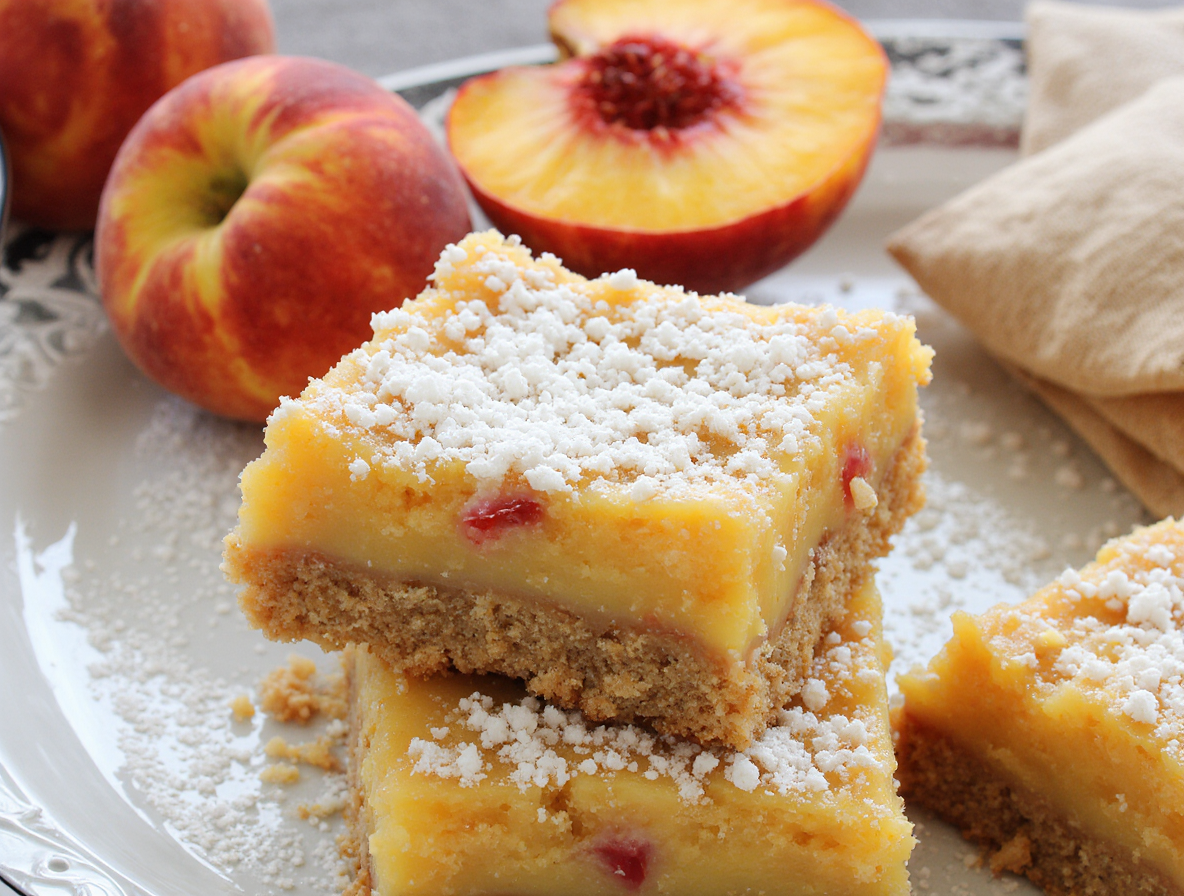
The aroma of ripe summer peaches fills the market as I shop for ingredients to make my favorite peach squares. These heavenly treats perfectly balance sweet,
juicy peaches with a rich, buttery shortbread crust , creating a dessert that hits every note just right .
When it comes to fresh peach squares recipes, you’ll need about 5 cups of sliced fresh peaches for the filling . These peach squares dessert recipes are
essentially summer in bite-size form, featuring a luscious peach layer in the middle sandwiched between a buttery shortbread base and a crumbly, slightly sweet
topping . Furthermore, if you love peaches, you absolutely need these bars in your life .
What makes this recipe for peach squares particularly special is how versatile they are. They’re ideal for summer gatherings, potlucks, or picnics , and they keep
very well – you can even freeze some for another time . Throughout this guide, we’ll walk through each step to ensure your fresh peach squares turn out perfectly
every time.
Essential Ingredients for Perfect Peach Squares
Selecting the perfect ingredients makes all the difference between ordinary and extraordinary peach squares. Let’s explore what you’ll need to create this
delightful summer treat.
Fresh vs. canned peaches: what works best
The star ingredient in any peach squares recipe is, naturally, the peaches themselves. While ripe, fresh peaches deliver the most authentic flavor and texture, you
have several options depending on the season.
Fresh peaches shine brightest during their peak season from May through September [1]. They provide a firmer texture and more vibrant color in baked goods
compared to preserved alternatives [1]. For the best results, look for peaches with a deep yellow color that yield slightly to gentle pressure and smell sweetly
fragrant [2]. You’ll need about 5 cups of sliced fresh peaches for a standard batch of peach squares [3].
Although fresh is preferable, frozen peaches work admirably as a substitute. There’s no need to thaw them before using, though you might need to add a few
extra minutes to your baking time [3].
Canned peaches can also work in a pinch, especially during winter months. However, be aware they’re already cooked and will create a softer filling [1]. If using
canned peaches, drain them well and consider using those packed in juice rather than heavy syrup to control sweetness [1].
Key ingredients for crust, filling, and topping
For the perfect crust base:
• Softened unsalted butter provides richness
• Granulated sugar adds sweetness
•
All-purpose flour forms the structure (use the spoon and level method for measuring) [4]
• Baking powder for just the right lift
• Salt to enhance flavors
The peach filling requires:
• Sliced peaches (fresh, frozen, or canned)
•
Brown sugar to accent the fruit’s natural sweetness [3]
• Cornstarch to thicken the juices
•
Ground cinnamon and a pinch of cardamom for warm flavor notes [3]
• Fresh lemon juice to brighten everything up
The crumble topping combines:
•
Cold butter (crucial for achieving that perfect crumbly texture) [5]
• Rolled oats for hearty texture
• Brown sugar for caramel notes
• Flour to bind everything together
• Ground cinnamon for warmth
Optional add-ins for flavor twists
Elevate your peach squares with these flavorful additions:
Almond extract pairs wonderfully with peaches, adding a subtle nutty dimension [3]. Likewise, pure vanilla extract brings depth to both the filling and crust [3].
For spice variations, try adding ground ginger alongside or in place of cinnamon [6]. Some bakers swear by cardamom with peaches for an unexpected but
delightful flavor pairing [7].
Consider incorporating nuts into your topping—sliced almonds complement the almond extract beautifully, while chopped pecans add wonderful texture and flavor
[8]. For fruit variations, you might combine peaches with blueberries or substitute other stone fruits like plums, apricots, or nectarines [7].
A simple glaze made from powdered sugar, cream, and a touch of almond extract can be drizzled over cooled bars for an extra touch of sweetness and visual
appeal [7].
Step-by-Step Recipe for Peach Squares
Now let’s roll up our sleeves and transform those fresh peaches into irresistible squares! Following these steps carefully ensures success every time.
1. Prepare the crust layer
Initially, preheat your oven to 350°F. Line a 9×9-inch baking pan with parchment paper, leaving about an inch overhang on two sides for easy removal later [9]. In
a large mixing bowl, combine flour, rolled oats, sugar, cinnamon, and salt. Add cold cubed butter and use a pastry blender or mixer with paddle attachment to
work it in until the mixture resembles coarse sand [1]. Once mixed, set aside approximately 1½ cups of this mixture for the topping [1]. Press the remaining dough
firmly into your prepared pan, creating an even base layer. Pre-bake this crust for 15 minutes until slightly golden and puffed [1].
2. Make the peach filling
As the crust bakes, prepare your filling. Place diced peaches in a large bowl and add lemon juice, flour, sugar, salt, cinnamon, and a touch of ginger [1]. Gently
toss until everything is well combined. For best results, use a slotted spoon when transferring the mixture to avoid excess juice that could make your crust soggy
[10].
3. Add the crumble topping
After removing the pre-baked crust from the oven, spread the peach mixture evenly across it. Subsequently, crumble your reserved crust mixture over the
peaches, trying to cover as much of the surface as possible [1]. For larger crumbs, squeeze portions of the mixture in your hand before sprinkling [11].
4. Bake to golden perfection
Return the pan to your oven and bake for approximately 45 minutes [1]. You’ll know it’s done when the top is slightly browned and you can see the peach filling
bubbling around the edges [1]. Oven times may vary, so start checking after 35 minutes.
5. Cool and slice neatly
Patience pays off here! Allow your peach squares to cool completely in the pan [1]. This crucial step ensures the filling sets properly and prevents messy squares.
For even cleaner cuts, refrigerate for about 30 minutes before slicing [12]. Once cooled, use the parchment paper overhang to lift the entire dessert out of the pan
before cutting into squares [9].
Tips and Tricks for Foolproof Results
Even with the best recipe, mastering a few key techniques will elevate your peach squares from good to spectacular.
How to pick ripe peaches
Perfect peach squares begin with selecting the right fruit. Look first for vibrant color—ripe peaches display rich golden-yellow hues with no green tints [13]. Gently
cradle the peach in your palm and press near the stem end; it should yield slightly without being mushy [7]. Additionally, a fragrant peach typically indicates good
flavor [2]. Store unripe peaches at room temperature, shoulder-side down in a single layer to prevent bruising [13]. For faster ripening, place them in a paper bag
which traps natural ethylene gas [7].
Avoiding soggy bottoms
Nobody enjoys a gummy, wet crust beneath their peach filling. To prevent this common issue, create a moisture barrier between filling and crust. Try dusting a
teaspoon each of flour and sugar on the bottom crust before adding filling [14]. Alternatively, a thin layer of crushed graham crackers absorbs excess juice without
making the filling gummy [15]. Indeed, baking on a preheated stone provides concentrated heat that helps set the bottom crust quickly [16].
Getting the crumble just right
For that perfect crumbly texture, combine your topping ingredients thoroughly, then set aside for about 10 minutes before using—this helps the mixture stick
together properly [17]. Your crumble should be browned when done, indicating it’s properly baked [17]. If the topping doesn’t hold together before baking, you may
need to add an extra tablespoon of flour [17].
Using parchment for easy removal
Parchment paper is undeniably your secret weapon for perfect peach squares. Create a “sling” by cutting parchment that extends up and over the sides [3]. This
overhang creates handles for lifting the entire dessert cleanly from the pan [18]. Secure the parchment with binder clips to prevent it from folding into the batter [3].
Since parchment is already non-stick, you don’t need to grease it [19].
Storage, Serving, and Variations
Fresh peach squares deserve proper storage to maintain their delicious flavor. After investing time in creating these treats, knowing how to preserve and serve
them completes your baking journey.
How to store peach squares
Keeping peach squares fresh requires proper storage. Place leftovers in an airtight container in the refrigerator, where they’ll maintain quality for 5-7 days [20].
Alternatively, store them at room temperature in a tightly covered container for up to 4 days [21]. For maximum freshness, refrigeration is generally preferable as it
prevents the cooked fruit from getting “funky” or soggy [22]. Remember that these dessert bars contain fresh fruit, so proper storage is crucial for preserving
texture and flavor.
Freezing and reheating tips
Peach squares freeze remarkably well for future enjoyment. Cut cooled bars into squares first, then place in an airtight, freezer-safe container with parchment
paper between layers [21]. Properly frozen peach squares remain good for up to 3 months [23]. To reheat from frozen, thaw overnight in the refrigerator [23], or
warm in a 300°F oven for 10-12 minutes [24]. For frozen unbaked bars, bake at 350°F for approximately 45 minutes from frozen [25].
Serving suggestions for summer events
For summer gatherings, serve these dessert squares with complementary additions. A scoop of vanilla ice cream alongside warm peach squares creates an
irresistible contrast [25]. Other excellent pairings include freshly whipped cream, mascarpone, crème fraîche, yogurt, or even a dollop of ricotta [26]. These versatile
treats work equally well for breakfast, snacks, or dessert [20], making them perfect for brunches, picnics, or evening cookouts.
Creative variations: berries, nuts, and glaze
Modify your recipe for peach squares with creative additions. Try combining peaches with other fruits—raspberries, blueberries, blackberries, plums, apricots, or
cherries all work beautifully [27]. Enhance the almond flavor by sprinkling sliced almonds (about ½ cup) over the dough dollops before baking [21]. Play with spices
by adding ground ginger alongside cinnamon and cardamom [21]. Consider finishing cooled squares with a simple peach glaze that can be stored in the
refrigerator until ready to use [28].
Conclusion
Summer desserts don’t get much better than these perfect peach squares. Throughout this guide, we’ve explored everything from selecting the juiciest peaches
to achieving that perfect crumbly topping. Above all, the beauty of this recipe lies in its versatility and foolproof nature, making it accessible for bakers of all skill
levels.
After trying these squares, you’ll understand why they’ve become my go-to summer treat. The contrast between the buttery shortbread base, juicy peach filling,
and crumbly topping creates a harmony of textures that delights with every bite. Additionally, their make-ahead potential means you can prepare them before any
gathering without last-minute stress.
Remember that while fresh peaches deliver unmatched flavor during summer months, this dessert adapts beautifully to frozen or canned varieties when
necessary. This flexibility ensures you can enjoy a taste of summer sunshine regardless of season. Likewise, the optional add-ins we discussed allow you to
personalize these squares to your exact preferences.
The next time ripe peaches appear at your local market, I hope you’ll grab a basketful and try this recipe. Whether served at a backyard barbecue, taken along to
a picnic, or enjoyed as an afternoon treat with tea, these peach squares will undoubtedly become a cherished addition to your baking repertoire. Most importantly,
baking should bring joy – and these golden, fragrant squares deliver that in abundance.
FAQs
Q1. What are the key ingredients for perfect peach squares? The main ingredients include fresh peaches, flour, butter, sugar, and cinnamon. For the crust
and topping, you’ll need rolled oats, while the filling requires cornstarch to thicken the peach juices. Optional add-ins like almond extract or nuts can enhance the
flavor.
Q2. Can I use canned or frozen peaches instead of fresh ones? Yes, you can use canned or frozen peaches if fresh ones aren’t available. Frozen peaches
work well without thawing, though you may need to adjust baking time. If using canned peaches, drain them well and consider those packed in juice rather than
syrup to control sweetness.
Q3. How do I prevent my peach squares from having a soggy bottom? To avoid a soggy bottom, try dusting the pre-baked crust with a mixture of flour and
sugar before adding the filling. Alternatively, use a thin layer of crushed graham crackers to absorb excess juice. Baking on a preheated stone can also help set
the bottom crust quickly.
Q4. What’s the best way to store peach squares? Store peach squares in an airtight container in the refrigerator for 5-7 days to maintain freshness. They can
also be kept at room temperature for up to 4 days. For longer storage, you can freeze them for up to 3 months in a freezer-safe container with parchment paper
between layers.
Q5. How can I add variety to my peach squares recipe? You can create variations by combining peaches with other fruits like raspberries or blueberries. Try
adding different spices such as ginger or cardamom, or incorporate nuts like sliced almonds or chopped pecans into the topping. A simple glaze made from
powdered sugar and cream can also be drizzled over cooled bars for extra sweetness.