How to Make Perfect Katsu Bowls: A Chef’s Secret Recipe Guide
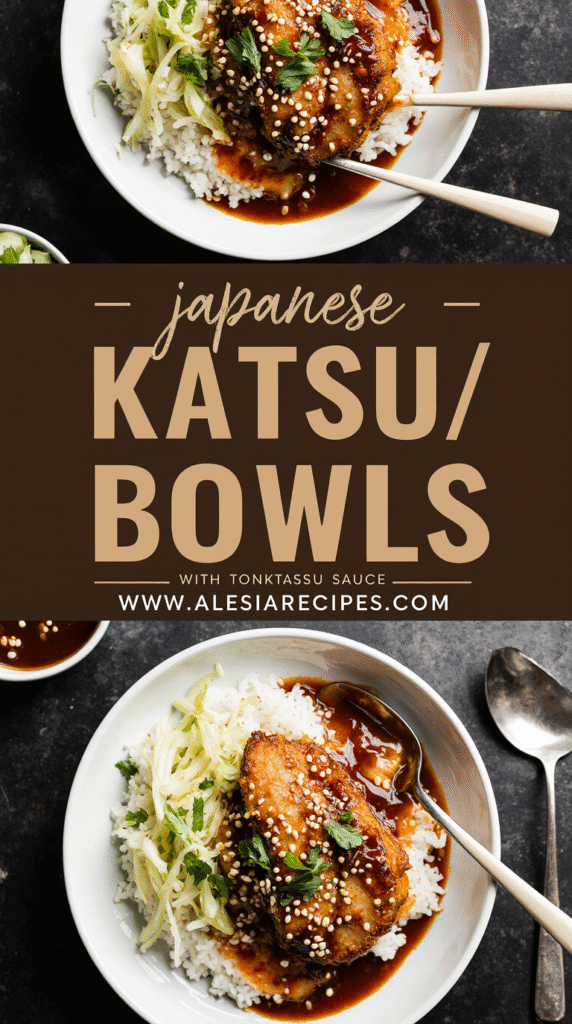
Crispy katsu bowls have become my tried-and-true favorite dish that I return to time and time again. Despite their restaurant-quality appearance, these Japanese-inspired rice bowls require just a few basic ingredients, and you don’t need to be a pro chef to nail it. In fact, they’ve become one of my favorite meals to have for lunch right now.
Known as “Sauce Katsu Don” in Japan, these colorful bowls are full of flavor and make a great family dinner any night of the week. Whether you’re looking for the perfect tonkatsu sauce recipe or want to learn how to make Japanese katsu sauce from scratch, I’ve got you covered. The best part? Katsu rice bowls are not only delicious but also easy to meal prep, offering a refreshing change if you’re bored with your weeknight chicken dinners. Furthermore, once you master the homemade tonkatsu sauce, you’ll find it’s so versatile that you might start using it on more than just katsu.
Choosing the Right Ingredients for Katsu Bowls
The secret to creating an authentic katsu bowl begins with selecting premium ingredients. When shopping for your components, each element plays a crucial role in achieving that restaurant-quality taste at home.
Best cuts of meat for katsu
The foundation of traditional katsu starts with the right cut of meat. For pork lovers, Chef Makoto recommends pork shoulder loin as the ideal choice because of its excellent marbling, sweet fat content, and delicious texture. This marbling is essential as it creates a protective layer that prevents the meat from drying out during frying, keeping it tender and juicy.
There are two main cuts used in Japan: hire-katsu (pork filet) and rosu-katsu (pork roast). While rosu-katsu offers more juiciness due to its marbled fat layers, hire-katsu tends to be more expensive since it requires higher quality meat to avoid dryness. For chicken katsu, boneless chicken thighs provide more moisture and juiciness compared to breasts, though both work well when properly prepared.
Vegetarian and seafood alternatives
For plant-based options, firm or extra-firm tofu makes an excellent katsu base. The spongy, chewy texture paired with crispy panko creates an unbeatable combination. To achieve a meatier texture, try freezing and defrosting the tofu beforehand.
Regarding seafood alternatives, white fish filets like cod, halibut, and rockfish work wonderfully for fish katsu. Salmon provides a buttery taste with healthy omega-3 fats, while mackerel offers a bolder flavor. When working with delicate fish like sole or tilapia, cut the pieces smaller and use a thin spatula when flipping to prevent them from falling apart.
Essential ingredients for tonkatsu sauce
Homemade tonkatsu sauce elevates any katsu bowl. The classic recipe combines Worcestershire sauce, ketchup, sugar (white or brown), and oyster sauce. Many variations exist, including adding soy sauce, mirin, Dijon mustard, and garlic powder. For a more complex flavor profile, incorporate grated fresh ginger and minced garlic.
The sweetness and tanginess come primarily from ketchup and Worcestershire, while soy sauce contributes the deep, savory notes. Although eaten with Japanese breaded cutlets, tonkatsu sauce actually has British origins, being a sweeter, thicker variation of Worcestershire sauce.
Rice and vegetable pairings
Short-grain Japanese rice traditionally forms the base of katsu bowls, though medium-grain works well too. For more flavor, consider coconut jasmine rice or pandan rice.
Traditional accompaniments include thinly shredded cabbage with a light dressing, which provides a cool contrast to the rich katsu. Additional vegetable options include cucumber, avocado, pickled ginger, and mixed greens. For a more substantial side, grilled pak choi, Asian broccoli salad, or Korean cucumber salad complement the crispy katsu perfectly.
Step-by-Step Guide to Making Crispy Katsu
Mastering the art of crispy katsu requires proper technique and attention to detail. Following these steps will ensure your katsu rice bowl has that perfect golden crust and juicy interior that makes this dish so irresistible.
How to pound and season the meat
Achieving uniform thickness is essential for even cooking. I place my meat between plastic wrap or in a ziplock bag, then pound it to approximately ½-inch thickness using a meat mallet or rolling pin. For pork cuts with connective tissue, I make small slits along the white areas to prevent curling during cooking.
Before proceeding, I season both sides generously with salt and pepper. Many chefs recommend adding garlic powder for additional flavor. This initial seasoning is crucial as it’s your only opportunity to flavor the meat directly.
Setting up a proper dredging station
A proper three-station setup makes the breading process seamless. I arrange shallow dishes in this order:
- All-purpose flour (seasoned with a pinch of salt)
- Beaten eggs (with a key trick: adding a tablespoon of flour or oil to create a thicker mixture that helps panko adhere better)
- Panko breadcrumbs
Using the “wet hand, dry hand” technique prevents clumping—one hand handles dry ingredients, the other manages wet components. After coating, I let the breaded cutlets rest for 5-10 minutes, allowing the coating to set properly.
Frying tips for golden, crispy texture
The ideal oil temperature ranges between 325-350°F—too hot and the outside burns before the inside cooks; too cool and the meat absorbs excess oil. I test readiness by dropping in a few panko crumbs; they should sizzle immediately without burning.
Furthermore, I never overcrowd the pan, as this lowers oil temperature dramatically. Frying each piece for 3-4 minutes per side typically achieves that perfect golden-brown exterior. Afterward, I drain on a wire rack rather than paper towels to maintain crispiness.
Air fryer vs. pan-frying methods
Traditional pan-frying delivers the most authentic texture, yet air fryers offer a healthier alternative. For air frying, I preheat to 375°F, spray the breaded cutlets lightly with oil, then cook for 12-15 minutes, flipping halfway. One important note: panko doesn’t brown as deeply in an air fryer.
For oven baking, I place the cutlets on a wire rack at 400°F for 20-25 minutes, turning once. Regardless of method, allowing the katsu to rest briefly before slicing ensures the juices redistribute for maximum tenderness.
How to Make and Use Tonkatsu Sauce
The rich, tangy flavor of tonkatsu sauce is what transforms a simple fried cutlet into an authentic katsu bowl experience. This versatile condiment balances sweet, savory, and tangy notes perfectly—and making it at home is surprisingly simple.
Simple homemade tonkatsu sauce recipe
At its most basic, homemade tonkatsu sauce requires just four ingredients that you likely already have in your pantry:
- Worcestershire sauce: 5 tablespoons (provides tangy depth)
- Ketchup: 5 tablespoons (adds sweetness and tomato base)
- Sugar: 2 tablespoons (balances acidity)
- Oyster sauce: 2 tablespoons (enhances umami notes)
Simply whisk everything together until the sugar dissolves completely. Let it sit for at least 30 minutes before serving to allow flavors to meld together.
Store-bought vs. homemade: what to choose
Bull-Dog is the classic brand, containing water, high fructose corn syrup, distilled vinegar, and tomato paste. Unlike some varieties, it contains no animal products, making it suitable for vegans. Conversely, homemade versions offer customization plus fresher flavor—additionally, they lack preservatives or high fructose corn syrup.
How to adjust sweetness and tanginess
Too sweet? Add a spritz of lemon juice to balance and brighten the flavor. For more tanginess, increase Worcestershire sauce; for sweetness, add more sugar or ketchup. Essentially, start with less sugar initially (under 1 tablespoon) and adjust according to preference.
Creative uses for leftover katsu sauce
Beyond katsu bowls, this sauce works brilliantly as:
- A glaze for grilled meats, salmon, or tofu
- A dipping sauce for fries and tempura
- A flavor boost for burgers and sandwiches
- A seasoning for stir-fries, especially yakisoba
- A topping for roasted vegetables like sweet potato
Properly stored in an airtight container, homemade tonkatsu sauce keeps for 2-3 weeks in the refrigerator.
Assembling and Customizing Your Katsu Rice Bowl
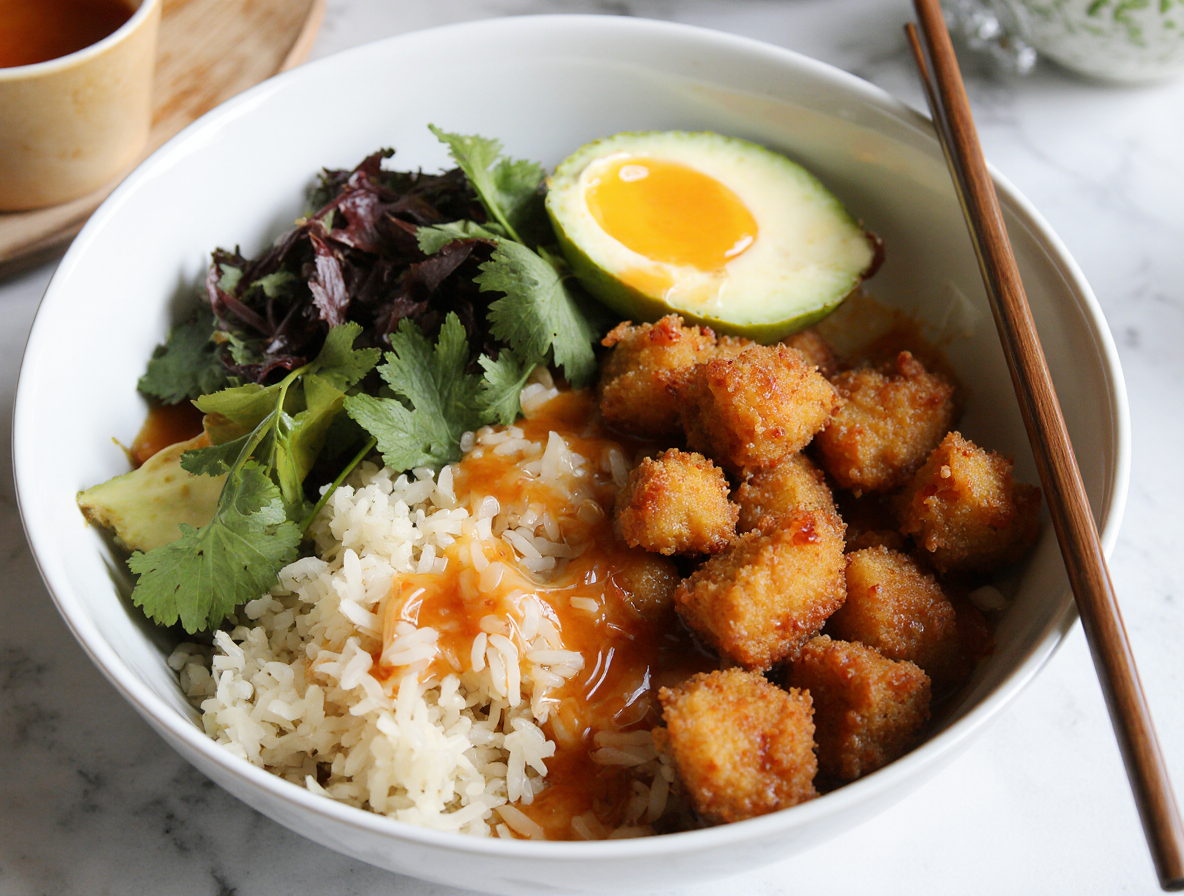
Now comes the fun part: assembling your katsu bowl! This is where creativity meets tradition, and you can transform separate elements into a cohesive, Instagram-worthy meal.
Layering rice, cabbage, and katsu
First and foremost, start with a base of fluffy white rice in a wide, shallow bowl. Next, arrange finely shredded cabbage on one side—this provides essential crunch and freshness that balances the rich katsu. Place your sliced katsu (cut into ½-inch strips using a gentle rocking motion) on top of the rice. For authentic presentation, fan the katsu pieces slightly rather than stacking them.
Toppings that add crunch and flavor
Customize your bowl with complementary toppings:
- Cucumber ribbons and carrot matchsticks for fresh crunch
- Avocado slices for creamy richness
- Pickled ginger for tangy brightness
- Green onions and toasted sesame seeds for finishing flair
Moreover, consider adding pickled vegetables—they provide a perfect contrast to the rich, fried katsu. Toasted sesame seeds add nutty depth and visual appeal when sprinkled on top.
Drizzle options: spicy mayo, Japanese mayo, or both?
Japanese Kewpie mayonnaise, made with egg yolks instead of whole eggs, delivers creamier texture and umami flavor. For spicy mayo, simply mix Japanese mayo with sriracha and a splash of lime juice for brightness. Instead of choosing between tonkatsu sauce and mayo, try both—drizzle tonkatsu sauce over the katsu, then add mayo in a zigzag pattern for restaurant-style presentation.
Presentation tips for a restaurant-style bowl
For eye-catching presentation, consider color contrast—place vibrant vegetables against the golden-brown katsu. Use a low pasta bowl rather than a deep one to showcase all components. Drizzle sauces in deliberate patterns rather than flooding the bowl, allowing each element to shine.
Meal prep and storage tips
Store components separately—katsu in an airtight container lined with paper towel to maintain crispiness. Above all, cool fried foods uncovered in the refrigerator before storing to allow steam to escape, keeping the exterior crisp. When reheating, avoid microwaves; instead, use an air fryer or oven at 350°F for 5-10 minutes to restore crispiness.
Conclusion
Katsu bowls truly represent the perfect blend of comfort food and culinary craftsmanship. Throughout this guide, I’ve shared my chef-tested techniques for creating restaurant-quality katsu at home without professional training. The crispy golden exterior contrasting with tender, juicy meat creates an irresistible texture that keeps me coming back to this dish again and again.
Remember, your choice of meat makes all the difference – whether you prefer the marbled richness of pork shoulder loin, the juiciness of chicken thighs, or plant-based alternatives like firm tofu. Additionally, homemade tonkatsu sauce elevates the entire dish from good to exceptional. Once you master this sweet-tangy condiment, you’ll find yourself using it for everything from glazes to dips.
Most importantly, katsu bowls offer endless customization possibilities. You can adjust the components based on your preferences or what’s available in your kitchen. After all, the beauty of making katsu at home lies in this flexibility.
Next time you’re stuck in a dinner rut, give these katsu bowls a try. They might seem intimidating at first glance, but as I’ve shown, the process breaks down into simple, manageable steps anyone can follow. The payoff – a perfectly crispy, flavorful meal that looks straight from a Japanese restaurant – makes every minute of preparation worthwhile. Your family will surely ask for seconds, and you’ll have added another versatile, crowd-pleasing dish to your cooking repertoire.
FAQs
Q1. How do I ensure the breading sticks to my katsu? To get the breading to stick, first dust the meat lightly with flour to absorb moisture. Then dip it in beaten egg, which acts as an adhesive. Finally, coat it thoroughly with panko breadcrumbs. Let the breaded cutlets rest for 5-10 minutes before frying to allow the coating to set properly.
Q2. What are the main ingredients for katsu batter? Katsu batter consists of three main components: flour, beaten eggs, and panko breadcrumbs. Set up a dredging station with these ingredients in separate shallow dishes. Coat the meat in flour first, then dip in egg, and finally cover with panko for that signature crispy texture.
Q3. Can you share a simple homemade tonkatsu sauce recipe? A basic homemade tonkatsu sauce recipe includes 5 tablespoons each of Worcestershire sauce and ketchup, 2 tablespoons of sugar, and 2 tablespoons of oyster sauce. Whisk these ingredients together until the sugar dissolves completely. Let it sit for at least 30 minutes before serving to allow the flavors to meld.
Q4. What are some popular toppings for katsu bowls? Popular toppings for katsu bowls include finely shredded cabbage for crunch, cucumber ribbons and carrot matchsticks for freshness, avocado slices for creaminess, and pickled ginger for tanginess. Green onions and toasted sesame seeds are often sprinkled on top for added flavor and visual appeal.
Q5. How can I reheat katsu to maintain its crispiness? To maintain the crispiness when reheating katsu, avoid using the microwave. Instead, use an air fryer or oven preheated to 350°F (175°C) and heat the katsu for 5-10 minutes. This method helps restore the crispy exterior while keeping the interior juicy.