How to Make Orange Creamsicle Cake: A Foolproof Guide for Home Bakers
As a kid, there were two ice cream bars I would ALWAYS get from the ice cream truck, and one of them was definitely the orange creamsicle. That perfect combination of tart, vibrant orange and creamy vanilla flavors still makes my mouth water today.
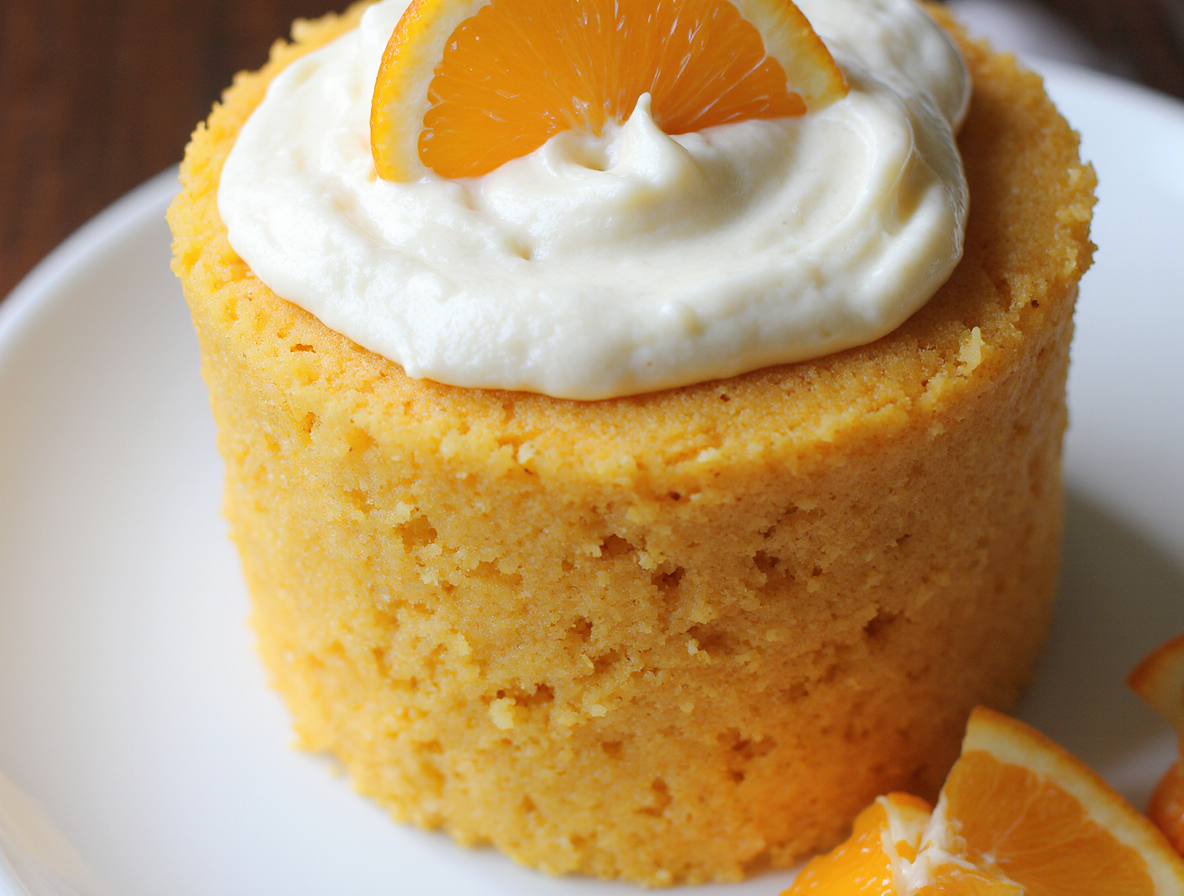
This easy orange creamsicle cake recipe captures those exact same flavors but in cake form. What makes our orange creamsicle cake from scratch special is that it’s made without cake mix or boxed orange jello – just real ingredients that create that nostalgic taste we all love. The sweet orange flavor makes for a refreshing bite that everyone will want more of. Whether you’re planning a summer get-together, birthday celebration, or potluck, this easy orange creamsicle cake is exceptionally great for any occasion.
In this guide, I’ll walk you through creating this delicious dessert step by step, from gathering the perfect ingredients to assembling and decorating your cake. As you dig in to each element of this cake, you’ll get that subtle orange flavor that tastes just like the ice cream bar. Let’s get baking!
Gathering Ingredients and Tools
Before diving into the baking process, gathering the right ingredients and tools ensures your orange creamsicle cake turns out perfectly. Creating this delicious dessert from scratch requires some preparation, yet the results are absolutely worth it.
Essential ingredients for cake, filling, and frosting
For the orange cake layers, you’ll need basic baking staples plus some special additions. Gather all-purpose flour, baking powder, salt, unsalted butter, granulated sugar, eggs, sour cream, vanilla extract, and of course, fresh oranges for both juice and zest. The orange zest and juice are crucial for achieving that authentic citrus flavor without relying on artificial ingredients.
For the creamy filling, you have two options. The first is a homemade orange curd using egg yolks, sugar, cornstarch, fresh orange juice, and butter. Alternatively, some recipes use a combination of cream cheese, vanilla pudding mix, and whipped topping for a lighter filling.
The frosting typically consists of unsalted butter, powdered sugar, heavy cream, and vanilla extract. Many bakers add a touch of orange extract or zest to enhance the creamsicle flavor profile. For a truly professional finish, Italian meringue buttercream provides that silky, smooth texture.
Recommended tools for home bakers
A digital kitchen scale is perhaps the most important tool for precise measurements. Additionally, you’ll need standard measuring cups and spoons, mixing bowls in various sizes, and either a hand mixer or stand mixer.
For baking the cake, three 8-inch or 9-inch round cake pans work best. A good quality offset spatula makes frosting the cake much easier, while a cake turntable, though optional, significantly simplifies the decorating process.
Other helpful tools include silicone spatulas for scraping bowls, a whisk, cooling racks, and piping bags with decorative tips if you plan to add special finishing touches.
Tips for choosing fresh oranges and zesting
When selecting oranges, look for fruits that feel heavy for their size, indicating juiciness. The skin should be bright orange, firm, and have a fresh, aromatic smell. Navel oranges work excellently for this recipe due to their sweetness and minimal seeds.
For zesting, a microplane grater produces the finest zest with minimal effort. Remember to wash and dry the oranges thoroughly beforehand, especially if using non-organic fruit. Moreover, only zest the colored part of the peel, avoiding the white pith which tastes bitter. Zest the oranges before juicing them, as it’s much easier to handle whole fruit.
Making the Orange Creamsicle Cake from Scratch
Now comes the fun part – bringing our orange creamsicle cake to life with fresh, vibrant flavors and proper techniques. The secret to this cake’s delicious taste lies in balancing the tart orange notes with creamy vanilla undertones.
Preparing the orange curd filling
First, create the luscious orange curd that gives this cake its signature flavor. In a medium saucepan, whisk together sugar, cornstarch, egg yolks, and fresh orange juice until well combined. For extra zing, add the zest from three oranges and one lemon – this combination enhances the orange flavor without being overpowering.
Cook the mixture over medium-low heat, stirring constantly until it thickens and begins to bubble. Once the curd coats the back of a wooden spoon (around 170°F), remove from heat and stir in butter until melted. Pour through a fine mesh strainer to remove any solids, then press plastic wrap directly onto the surface to prevent a skin from forming. Refrigerate until completely cool, at least 3 hours.
Mixing the cake batter with orange juice and zest
For the cake itself, you have two options: from scratch or doctored cake mix. For scratch baking, cream butter and sugar until light and fluffy, then add egg whites gradually. Subsequently, incorporate sour cream, orange extract, and orange zest.
In a separate bowl, whisk together the dry ingredients – flour, baking powder, and salt. Alternately add this mixture and buttermilk to your batter, beginning and ending with the flour mixture. Mix only until combined – overmixing creates a tough cake.
Baking and cooling the cake layers
Divide your batter evenly between three 8-inch round pans (about 22 ounces per pan). Bake at 325°F for approximately 30-35 minutes or until a toothpick inserted comes out with a few moist crumbs.
Allow the cakes to cool in their pans for 10-15 minutes, then carefully invert onto cooling racks. Cooling completely is absolutely essential before frosting – otherwise, your beautiful layers will slide apart! For best results, let the layers cool at room temperature for an hour, then wrap in plastic and refrigerate to firm up.
Creating the Frosting and Assembling the Cake
With our cake layers cooled and orange curd prepared, it’s time to focus on creating that silky-smooth frosting and assembling our orange creamsicle cake. The right frosting makes all the difference between a good cake and an exceptional one.
How to make Italian meringue buttercream
Italian meringue buttercream offers the perfect balance – silky texture, stability, and less sweetness than traditional American buttercream. To make it:
- Wipe down your mixing bowl with lemon juice or vinegar to remove any traces of oil
- Place egg whites in your stand mixer bowl with the whisk attachment
- Combine sugar and water in a saucepan, cover with a lid, and bring to a boil
- Continue boiling uncovered until your thermometer reaches 240°F
- Begin whisking egg whites on high to soft peaks
- Drizzle the hot syrup between the whisk and bowl sides (avoid splatter)
- Whip to stiff peaks, then cool the meringue completely
- Add softened butter gradually until light and fluffy
For a creamsicle flavor, incorporate orange extract alongside vanilla extract after the butter is fully incorporated.
Layering with filling and frosting
Place your first cake layer on a cake board or stand. Pipe a buttercream dam around the edge to contain the filling. This prevents the orange curd from spilling out between layers. Spread half the orange curd inside this dam, creating a delicious flavor center.
Add your second layer, repeat the dam and filling process, then top with the final layer (bottom side up for a flat top). Apply a thin crumb coat around the entire cake, then refrigerate for 15-30 minutes until set.
Decorating tips for a creamsicle look
For that classic orange-and-white creamsicle esthetic, try these techniques:
Create a watercolor effect by dividing your buttercream into portions. Leave one white, color another light orange, and a third deeper orange. Apply random patches of each color around your cake, then smooth with a scraper for a beautiful blended finish.
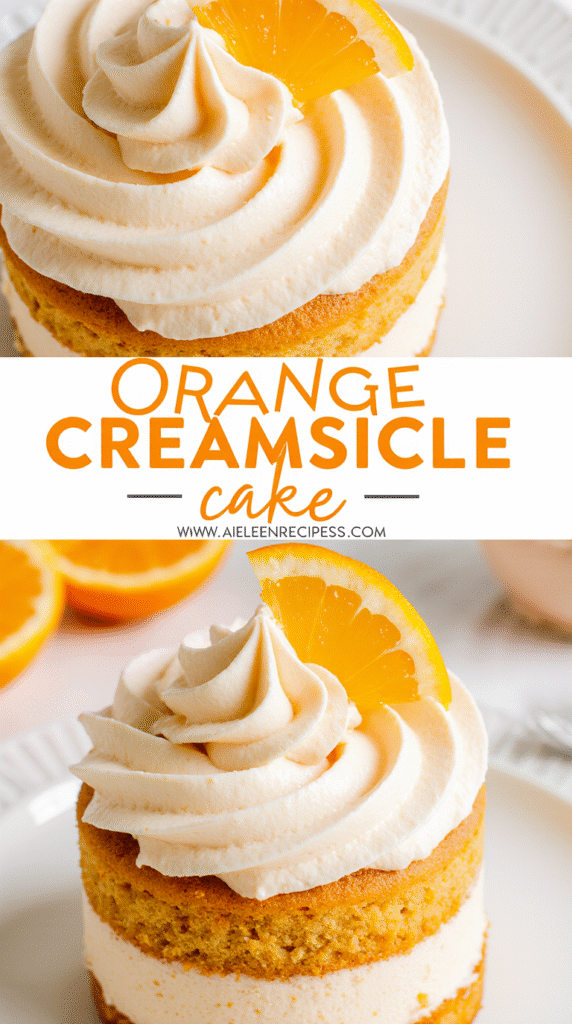
Alternatively, frost the cake completely white, then add orange-colored buttercream swirls on top. For extra flair, garnish with candied orange slices between each swirl.
Remember that your decorated cake should be refrigerated initially to set the frosting, yet served at room temperature for the best flavor experience.
Expert Tips and Storage Advice
Creating a professional orange creamsicle cake requires not just great technique but also some insider knowledge. Let me share practical advice that will elevate your cake game and help you manage the baking process efficiently.
How to avoid domed cake layers
Ever notice how cakes often rise into a dome? This happens because the edges bake faster than the middle, causing uneven rising. For perfectly flat layers, try these proven methods:
- Lower your oven temperature by 10 degrees than the recipe suggests – this allows for more even baking throughout the cake.
- Use cake strips (fabric strips soaked in water) wrapped around your pans. These maintain cooler edges, ensuring even rising.
- If you don’t have cake strips, wrap the outside of your pans with a double layer of heavy-duty foil as an alternative.
Alternatively, simply level domed cakes after baking using a serrated knife or cake leveler for professional-looking layers.
Make-ahead and freezing instructions
I always recommend preparing components ahead for stress-free baking:
The orange cake layers can be made up to two days in advance and stored at room temperature when tightly wrapped in plastic. For longer storage, freeze unfrosted layers for up to three months.
Prepare your frosting ahead and store in an airtight container in the refrigerator for up to two weeks. Bring it back to room temperature and re-whip before using.
The orange curd filling can be prepared one day ahead and refrigerated overnight.
Storing the cake for freshness
After assembling your orange creamsicle cake:
Store the frosted cake at room temperature under a cake dome for up to three days. Once cut, press plastic wrap against exposed cake surfaces to prevent drying.
For longer storage, refrigerate the cake for up to five days. Just remember that refrigeration can dry cakes out faster than room temperature storage.
Freeze fully frosted cake by placing it in the freezer until the frosting hardens (about 20 minutes), then wrap tightly in plastic wrap followed by foil for up to three months.
Conclusion
Orange creamsicle cake truly stands as a perfect blend of childhood nostalgia and sophisticated baking. Throughout this guide, we’ve explored every step needed to create this delightful dessert from scratch, using real ingredients rather than boxed mixes. The combination of vibrant orange and creamy vanilla flavors creates that classic creamsicle taste we all remember fondly.
Remember, the secret to this cake’s success lies in the details. Fresh orange zest and juice provide authentic flavor, while the homemade orange curd filling adds that perfect tangy-sweet center. Additionally, the Italian meringue buttercream creates a silky, stable frosting that complements the citrus notes beautifully.
Baking this cake might seem intimidating at first glance, but as you can see, breaking down the process into manageable steps makes it accessible for bakers of all skill levels. Most importantly, the techniques we’ve covered – from preventing domed layers to proper storage methods – apply to many other baking projects as well.
What makes this recipe special is its versatility. You can prepare components ahead of time, freeze layers for later use, or adjust the decoration to suit any occasion. After all, this cake works equally well for summer gatherings, birthday celebrations, or simply satisfying that orange creamsicle craving.
The next time you’re looking to impress guests or simply treat yourself, this orange creamsicle cake delivers that perfect balance of impressive presentation and nostalgic flavor. Your first bite will transport you back to those sunny childhood days, ice cream truck bells ringing in the distance. Happy baking – and even happier eating!
FAQs
Q1. What makes this orange creamsicle cake different from other recipes? This cake is made entirely from scratch, using fresh oranges for authentic flavor instead of artificial ingredients or boxed mixes. It features a homemade orange curd filling and Italian meringue buttercream for a sophisticated take on the classic creamsicle taste.
Q2. Can I prepare parts of this cake in advance? Yes, you can make the cake layers up to two days ahead and store them at room temperature. The frosting can be prepared and refrigerated for up to two weeks, while the orange curd filling can be made a day in advance. Just bring components to room temperature before assembling.
Q3. How do I achieve flat cake layers without doming? To prevent doming, try lowering your oven temperature by 10 degrees, using cake strips around your pans, or wrapping the outside of your pans with heavy-duty foil. These methods promote even baking and help create flat layers.
Q4. What’s the best way to store the finished orange creamsicle cake? The frosted cake can be stored at room temperature under a cake dome for up to three days. For longer storage, refrigerate for up to five days, but remember that refrigeration can dry out the cake faster. You can also freeze the fully frosted cake for up to three months.
Q5. How can I decorate the cake to look like a creamsicle? To achieve a creamsicle look, you can create a watercolor effect by blending white, light orange, and deeper orange frosting on the cake’s exterior. Alternatively, frost the cake white and add orange-colored buttercream swirls on top, garnishing with candied orange slices for extra flair.