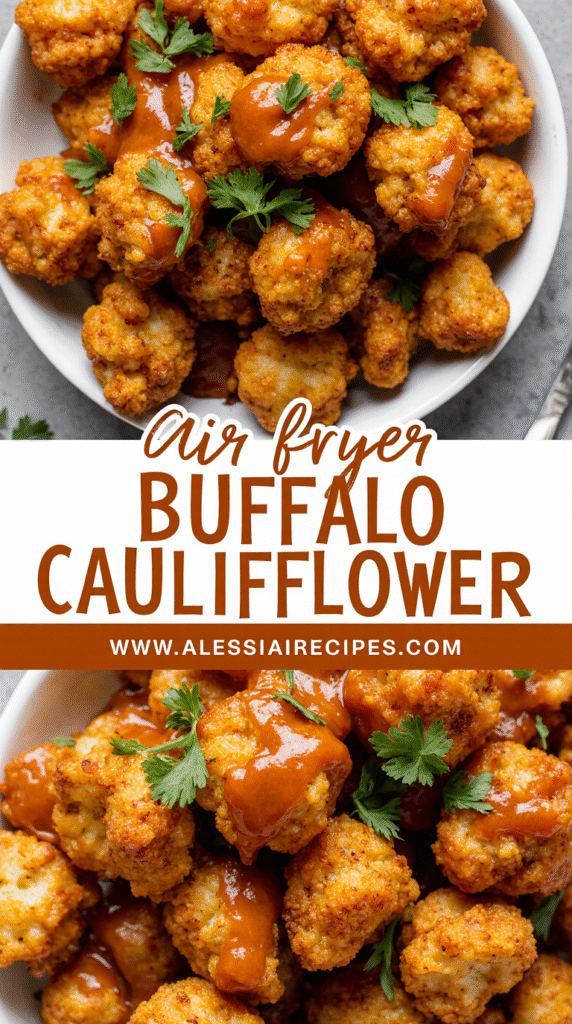
How to Make Air Fryer Buffalo Cauliflower That’s Actually Crispy (Step-by-Step Guide)
Air fryer buffalo cauliflower might actually be better than the oven version, delivering that perfect crispy texture we all crave in buffalo-style anything. While traditional buffalo wings require deep frying and lots of oil, this healthier alternative gives you all the flavor without the guilt.
Basically, what you’re getting is a vegetarian version of wings (yes, cauliflower wings!) that’s both vegan and gluten-free. The best part? This crispy air fryer buffalo cauliflower recipe is ready in under 15 minutes, making it the perfect appetizer or veggie side dish for game day gatherings. Additionally, you only need four simple ingredients and minimal prep time to create these perfectly spicy, golden bites.
In this step-by-step guide, I’ll show you exactly how to achieve that deep-fried-style crispiness using the air fryer’s magic. From selecting the right cauliflower to creating the perfect coating and sauce, we’ll cover everything you need to know to make buffalo cauliflower that’s actually crispy – no breading required if that’s your preference!
Choose and Prep the Cauliflower
The foundation of crispy air fryer buffalo cauliflower begins with selecting and preparing your vegetable properly. Simply throwing any cauliflower into your air fryer won’t yield those restaurant-quality results you’re looking for. Let me walk you through the essential steps to set yourself up for success.
Pick fresh cauliflower for best texture
Selecting the perfect cauliflower makes a significant difference in your final dish. Look for heads that feel heavy for their size with tightly packed, creamy white florets and vibrant green leaves firmly attached. These indicators suggest freshness and optimal texture. Furthermore, examine the cauliflower carefully for any blemishes, dark spots, or loose sections that spread out – these are signs of age or improper storage.
A quality cauliflower should have a fresh, mild smell. Avoid any that have an overwhelming or unpleasant odor, as this often indicates the vegetable is past its prime. Remember that fresher cauliflower will crisp up better in your air fryer, giving your buffalo cauliflower that perfect texture.
Cut into even-sized florets
Once you’ve selected your cauliflower, proper cutting technique ensures even cooking:
- Remove the green outer leaves from the base of the cauliflower
- Position the cauliflower stem-side down on your cutting board for stability
- Cut the cauliflower in half vertically through the core
- Remove the fibrous center core by cutting at an angle
- Break or cut the cauliflower into bite-sized florets (about 1 to 1.5 inches)
The size of your florets is crucial – they should be small enough to eat in one bite yet large enough to dredge easily. Consequently, aim for consistent sizing across all pieces, as this promotes even cooking and browning. Keeping florets around 1 to 1.5 inches creates more surface area for that delicious buffalo coating to cling to.
Pat dry to remove moisture
This step might seem minor, nevertheless it’s absolutely critical for achieving that coveted crispiness in your air fryer buffalo cauliflower. After washing your cauliflower (which you should definitely do to remove dirt and debris), thoroughly pat the florets dry using paper towels or a clean kitchen towel.
Excess moisture is the enemy of crispiness. When cauliflower retains too much water, it steams rather than roasts in the air fryer, resulting in soggy florets instead of the crispy buffalo cauliflower you’re aiming for. Some chefs even recommend letting the cauliflower air dry for a few minutes after patting to ensure maximum moisture removal.
Don’t be tempted to skip this step – those extra moments spent drying your cauliflower will pay off with noticeably crispier results that better resemble traditional buffalo wings in texture.
Make the Crispy Coating
The secret to incredibly crispy air fryer buffalo cauliflower lies in creating the perfect coating. This crucial step transforms ordinary cauliflower into a crave-worthy snack that rivals traditional wings.
Mix flour, cornstarch, and spices
Cornstarch is your best friend when creating crispy air fryer buffalo cauliflower. This humble ingredient makes a tremendous difference in achieving that perfect crunch. In a large bowl, combine flour (all-purpose works great, yet white whole wheat or gluten-free options work too), cornstarch, and a flavorful spice blend. For a classic buffalo flavor profile, mix garlic powder, onion powder, paprika, salt, and pepper. Some recipes include smoked paprika for depth or cayenne for extra heat.
The ratio matters – approximately equal parts flour and cornstarch creates the ideal crispy exterior. This dry mixture forms the foundation of your coating, providing both structure and flavor to your cauliflower bites.
Create a thick batter with water or milk
Next, transform your dry ingredients into a coating that will adhere perfectly to your cauliflower. Add water or milk to your flour mixture and whisk until smooth. The consistency should resemble pancake batter – thick enough to cling to the florets without dripping off entirely.
For dairy-free options, almond milk works wonderfully. Some recipes even use club soda or seltzer water, which creates a light, tempura-like batter that crisps beautifully in the air fryer.
Coat florets evenly for full coverage
Proper coating technique makes all the difference. Working in batches, thoroughly dip each cauliflower floret into your batter, ensuring it reaches every nook and cranny. Allow excess batter to drip off before placing in your air fryer.
For extra crispiness, consider double-dipping your florets – first in the wet mixture, then in the dry, and back into the wet again. Another option includes incorporating panko breadcrumbs after the initial coating for additional crunch.
Remember that the batter is what gives your cauliflower its crispy “fried” effect, therefore thorough coating is essential for achieving that restaurant-quality texture you’re seeking.
Air Fry to Golden Perfection
Now comes the exciting part – transforming your coated cauliflower into crispy, golden bites that rival traditional buffalo wings. The air fryer’s magic lies in its ability to create that satisfying crunch without deep frying.
Preheat the air fryer to 400°F
For optimal results, preheating is essential. Most recipes recommend setting your air fryer to 400°F (200°C) and allowing it to heat for about 5 minutes. This initial step ensures your cauliflower begins cooking immediately upon entering the basket, which leads to better browning and crisping. Preheating also helps your cauliflower cook more evenly throughout.
Arrange in a single layer without crowding
Once preheated, place your coated cauliflower florets in a single layer in the air fryer basket, leaving space between each piece. This arrangement is crucial – overcrowding is the primary cause of soggy buffalo cauliflower. During cooking, each floret needs air circulation around all sides. If your air fryer is small, cook in batches rather than cramming everything in at once.
Flip halfway and spray with oil
After approximately 7-8 minutes, open the air fryer and carefully flip each cauliflower piece. At this point, lightly spray or brush the florets with oil for enhanced crispiness. This mid-cooking oil application creates that golden, glazed exterior that makes restaurant-style buffalo cauliflower so irresistible.
Cook until edges are dark and crisp
Complete the cooking process until your cauliflower reaches golden perfection. Total cooking times vary between 15-20 minutes depending on your specific air fryer model. For the crispiest results, look for visual cues: the edges should turn dark brown and develop a visibly crunchy texture. Remember to remove the cauliflower promptly once cooking is complete – leaving it in the basket after the program ends can cause unwanted steaming and soggy results.
Add the Buffalo Sauce and Serve
The crowning glory of any buffalo dish comes after the initial cooking – applying that signature spicy, tangy sauce that gives these bites their name.
Toss in buffalo sauce after air frying
Once your cauliflower emerges golden from the air fryer, it’s time for the flavor transformation. In a large bowl, whisk together buffalo sauce with a tablespoon of melted butter or olive oil until fully combined. This simple step creates a silky, clingy sauce that adheres beautifully to your crispy florets. Gently toss the hot cauliflower in this mixture until each piece is evenly coated on all sides.
Optional: return to air fryer for 2 minutes
For truly next-level crispy air fryer buffalo cauliflower, place the sauce-coated florets back into your air fryer. A quick 2-5 minute session under the broil setting creates magical results – caramelizing the sauce slightly while maintaining that perfect texture. Keep a close eye during this final cooking phase since the sugar in the sauce can burn quickly.
Serve with ranch, celery, or carrots
Complete your buffalo cauliflower experience with classic accompaniments:
- Cooling dips like ranch, blue cheese, or Greek yogurt ranch
- Fresh, crunchy celery and carrot sticks
- For adventurous eaters, try cilantro jalapeño ranch dipping sauce
These traditional sides provide the perfect temperature and texture contrast to your spicy, crispy air fryer buffalo cauliflower bites. Serve immediately while still hot and crunchy.
Conclusion
Air fryer buffalo cauliflower truly stands as a game-changing alternative to traditional buffalo wings. Throughout this guide, we’ve explored every crucial step needed to achieve that restaurant-quality crispiness without deep frying. Certainly, the combination of proper cauliflower selection, thorough drying, and that special cornstarch-flour coating creates the perfect foundation for crispy results.
Remember, several key techniques make all the difference – patting your cauliflower completely dry, creating that thick, clingy batter, and most importantly, arranging the florets in a single layer during air frying. Additionally, that final toss in buffalo sauce (with the optional return to the air fryer) delivers that signature spicy-tangy flavor we all crave.
What makes this recipe particularly appealing is how it transforms a humble vegetable into a crowd-pleasing appetizer while still keeping things relatively healthy. After all, you’re getting all that buffalo wing satisfaction with significantly less oil and calories. The entire process takes under 15 minutes, making it perfect for last-minute entertaining or weeknight snacking.
Whether you’re a vegetarian looking for wing alternatives or simply someone trying to incorporate more vegetables into your diet, this air fryer buffalo cauliflower recipe deserves a spot in your regular rotation. Therefore, grab your air fryer, pick up some fresh cauliflower, and prepare to enjoy crispy, spicy perfection that might just make you forget about traditional wings altogether!
FAQs
Q1. How long does it take to make air fryer buffalo cauliflower? The entire process takes under 15 minutes, making it a quick and easy appetizer or snack option.
Q2. Can I make this recipe gluten-free? Yes, you can use gluten-free flour alternatives in the coating to make this recipe suitable for those with gluten sensitivities.
Q3. What’s the secret to getting crispy cauliflower in an air fryer? The key is to pat the cauliflower dry, use a cornstarch-flour coating, and arrange the florets in a single layer in the air fryer basket to ensure proper air circulation.
Q4. Is air fryer buffalo cauliflower healthier than traditional buffalo wings? Yes, it’s a healthier alternative as it uses significantly less oil and fewer calories while still providing that satisfying buffalo flavor.
Q5. What should I serve with air fryer buffalo cauliflower? Serve with cooling dips like ranch or blue cheese dressing, and add fresh celery and carrot sticks for a classic buffalo wing experience.


