How to Make the Perfect Oreo Dirt Cake: A Foolproof Recipe Guide
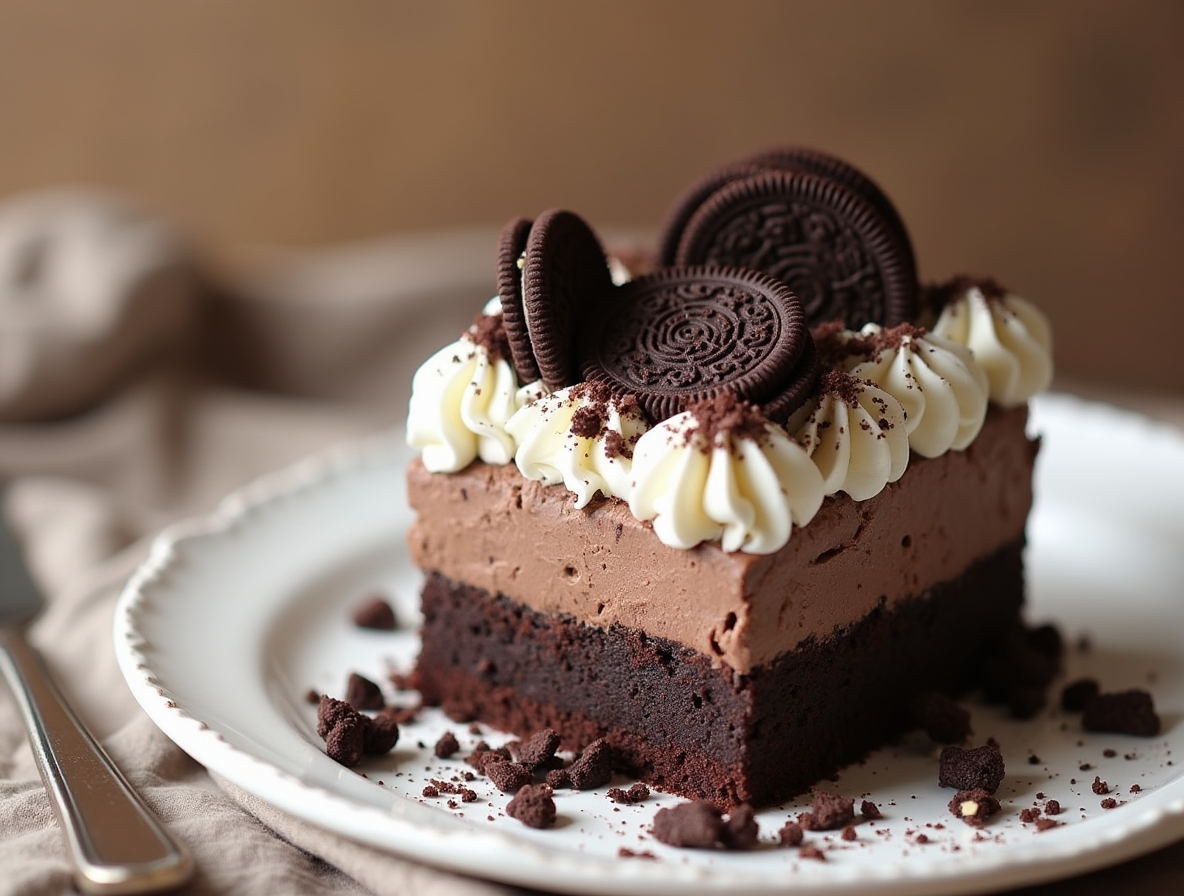
Oreo dirt cake has been a beloved no-bake dessert in families for almost 20 years, and I can see why! With just 10 minutes of preparation time, this creamy, cookie-filled treat delivers impressive results that particularly delight at children’s birthday parties and summer gatherings.
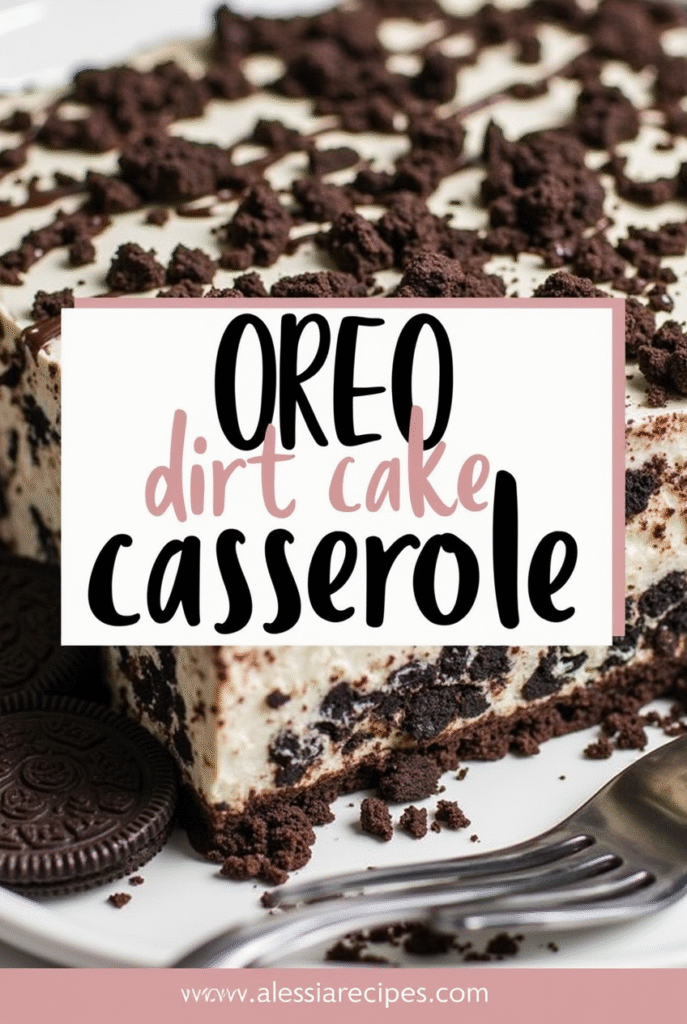
We’ve found that this easy Oreo dirt cake recipe is incredibly versatile. You can layer 46 crushed Oreos with a smooth French vanilla pudding mixture in a baking dish, trifle bowl, individual cups, or even a flower pot for a whimsical presentation. Additionally, the finished dessert needs at least 3 hours to chill, but can be made up to 24 hours ahead, making it perfect for busy hosts. For instance, adding gummy worms on top enhances the “dirt” theme that kids absolutely love! In this guide, I’ll show you exactly how to make Oreo dirt cake with simple ingredients and foolproof steps that guarantee delicious results every time.
Oreo Dirt Cake Ingredients and Substitutions
The versatility of Oreo dirt cake comes from its simple yet customizable ingredients. Let’s explore what goes into this no-bake dessert and how you can adapt it to your preferences.
Oreos: classic, double-stuffed, or flavored
The foundation of any great dirt cake is the Oreos. Regular Oreos work perfectly in this recipe, though some bakers prefer using double-stuffed for extra creaminess. However, many find that regular Oreos provide the best texture and balanced sweetness. When crushing your cookies, keep the cream filling intact—it adds sweetness and helps bind the crumbs. For a creative twist, try golden Oreos to create a “sandy beach” theme instead of dirt. One standard package (about 36-46 cookies) is typically enough for a complete dirt cake.
Pudding options: vanilla, French vanilla, or chocolate
The pudding layer is where you can truly customize your dirt cake. Most recipes call for instant vanilla pudding—never cook-and-serve. French vanilla pudding is often considered the secret ingredient that makes the best dirt cake. Nevertheless, chocolate pudding creates a more authentic “dirt” appearance. Moreover, you can experiment with white chocolate, cheesecake, or even pistachio pudding for unique variations. Whatever flavor you choose, remember to use the instant variety for proper setting.
Cool Whip vs. homemade whipped cream
Cool Whip has been a staple in dirt cake recipes since its invention in 1966. Unlike homemade whipped cream, it doesn’t melt quickly, making it ideal for desserts with longer shelf lives. Furthermore, it holds up well to warmer temperatures. Though homemade whipped cream offers a lighter, fluffier texture, it requires more effort to prepare. Both have their place—Cool Whip for convenience and stability, whipped cream for fresher, shorter-term servings.
Milk types and their effect on texture
The type of milk you use significantly impacts your dirt cake’s creaminess. Whole milk or 2% milk delivers the richest, creamiest results. In fact, many recipes specifically recommend against using skim or non-dairy milk. If serving someone who’s lactose intolerant, lactose-free milk works perfectly as it behaves identically to regular milk in recipes.
Optional add-ins: gummy worms, candy rocks
Gummy worms are the classic decoration that makes dirt cake fun, especially for children. Yet there are many creative alternatives. Candy rocks make wonderful decorations, creating a realistic garden appearance. Seasonal themes can be achieved with candy pumpkins for Halloween, Peeps for Easter, or plastic shovels and candy flowers for garden parties. Just remember to add gummy worms right before serving so they don’t get slimy.
Step-by-Step Guide to Making the Filling
Creating the perfect filling is what makes an Oreo dirt cake truly exceptional. Following this step-by-step process will ensure your dessert has that ideal creamy texture everyone loves.
1. Mix the pudding and milk
The foundation of our creamy filling starts with properly prepared pudding:
- In a large bowl, pour your milk and add the instant pudding mix. Most recipes call for vanilla or French vanilla pudding, but chocolate works wonderfully as well.
- Whisk vigorously for about 2 minutes until the mixture begins to thicken.
- Once slightly thickened, set it aside. Some recipes recommend chilling this mixture in the refrigerator while preparing other components.
Pro tip: The pudding will continue to set as it stands, so don’t worry if it seems a bit thin initially.
2. Cream the butter, cream cheese, and sugar
Next, we’ll create the rich, creamy base:
- In a separate bowl, add softened cream cheese and butter. These must be at room temperature for proper blending.
- Beat with an electric mixer until completely smooth and creamy.
- Gradually add powdered sugar and continue mixing until the mixture becomes light and fluffy.
3. Combine pudding with cream cheese mixture
Now comes the crucial step of bringing everything together:
- There are two approaches here: either add the cream cheese mixture to the pudding or fold the pudding into the cream cheese mixture.
- Whichever method you choose, mix gently but thoroughly until well combined.
- Use a spatula to scrape down the sides of the bowl, ensuring everything is incorporated evenly.
4. Fold in the whipped topping
Finally, we’ll add the component that gives our filling its irresistible fluffiness:
- Add the Cool Whip or homemade whipped cream to your mixture.
- Instead of beating, use a folding motion with a spatula to incorporate the whipped topping.
- Continue folding gently until no white streaks remain and the mixture has a uniform color and texture.
This completed filling will be perfectly smooth, creamy, and ready to layer with your crushed Oreos. The careful combination of these ingredients creates that signature dirt cake texture that’s simultaneously light yet rich.
How to Assemble the Perfect Oreo Dirt Cake
After preparing your pudding mixture and crushed Oreos, the assembly process transforms these components into an impressive dessert. Proper layering technique is essential for both visual appeal and optimal flavor blending.
Layering the crushed Oreos and pudding mixture
The layering sequence depends on your serving dish, yet most recipes recommend starting with a pudding layer, followed by crushed Oreos. For a standard trifle dish:
- Begin with approximately 2 cups of pudding mixture spread evenly at the bottom
- Add a heaping cup of crushed Oreos on top
- Continue alternating layers until you reach the top
- Always finish with an Oreo “dirt” layer for authentic appearance
Some recipes suggest starting with Oreos instead, especially in flat dishes. The goal is creating distinct, visible layers that will blend slightly during chilling.
Tips for even layers and best texture
To achieve professional-looking results:
- Use the back of a spoon to press down Oreo crumbs slightly, creating a stable base
- Spread pudding in spoonfuls across the surface before smoothing to prevent disturbing lower layers
- Push Oreo crumbs up the sides of clear dishes to create the appearance of thicker “dirt” layers
- Ensure Oreos are crushed properly—aim for gravel-sized pieces rather than fine powder for best texture
- Leave small chunks of Oreos intact for authentic “dirt” appearance
Choosing the right dish: trifle, pan, or cups
Your serving vessel significantly impacts both presentation and layering possibilities:
- Trifle bowl: Ideal for showcasing multiple layers and creating dramatic presentation—most recipes recommend 3-4 complete layer sets
- 9×13 baking dish: Perfect for larger gatherings but typically allows for only two complete layer sets
- Individual cups: 5-6 ounce clear cups create perfect single servings that showcase layers beautifully
- Flower pot: For whimsical presentation, especially for children’s parties—just ensure it’s new and clean
Whatever vessel you choose, the assembled dessert requires proper chilling—anywhere from 2-12 hours depending on recipe specifications—to allow flavors to meld and textures to set properly.
Serving, Decorating, and Storing Your Cake
The presentation of your Oreo dirt cake can transform it from a simple dessert into a showstopper that delights guests. Once you’ve perfected the layers, it’s time to focus on those finishing touches that make this treat truly memorable.
Fun decoration ideas: worms, flowers, seasonal themes
The classic gummy worm topping is just the beginning! Get creative with these themed decoration ideas:
- Garden scene: Add gummy worms partially buried in the “dirt” coupled with artificial flowers for a garden effect
- Construction zone: Place toy tractors, safety cones, or mini dump trucks on top for birthday parties
- Seasonal celebrations: Use candy pumpkins and cookie gravestones for Halloween, Peeps and candy eggs for Easter, or shredded coconut colored green for “grass” in spring
Want something unique? Try a beach theme using golden Oreos as “sand” with mini umbrellas, or create a dinosaur landscape with toy dinosaurs and candy rocks.
How long to chill before serving
Proper chilling is crucial for the best flavor and texture. According to most sources, you should:
Chill your dirt cake for at least 4 hours before serving, although some recipes suggest a minimum of 2 hours. For optimal results, refrigerate overnight—this allows the pudding and Oreos to meld together beautifully. The dessert tastes best when served cold, so remove from refrigeration no more than 30 minutes before serving.
Storage tips: fridge vs. freezer
Keep your Oreo dirt cake fresh with these storage guidelines:
In the refrigerator, store tightly covered with plastic wrap or in an airtight container for up to 3-5 days. Never leave at room temperature for more than an hour.
Regarding freezing, opinions vary. Some sources indicate you can freeze dirt cake for up to 1-3 months, while others advise against freezing as the cream cheese layer may separate when thawed.
Make-ahead tips for parties
This dessert is perfect for advance preparation! You can:
Make the entire dessert 24 hours ahead and refrigerate. For best results when preparing further in advance, store components separately—keep crushed Oreos in a resealable bag and pudding mixture in an airtight container. Assemble just before serving to maintain optimal texture.
For parties, consider preparing individual servings in clear cups or mini flower pots with plastic shovels as spoons—these can be made a day ahead and make serving effortless.
Conclusion
Oreo dirt cake stands out as one of the most versatile and crowd-pleasing desserts you’ll ever make. Throughout this guide, we’ve seen how this simple treat transforms basic ingredients into something truly special. The combination of crushed Oreos with that creamy pudding mixture creates magic that appeals to both children and adults alike.
My favorite aspect of this dessert is undoubtedly its adaptability. You can certainly customize it with different pudding flavors, serving vessels, or creative toppings based on your event theme. Furthermore, the make-ahead nature of dirt cake makes it perfect for busy hosts who need reliable dessert options without last-minute stress.
Time works wonders for this dessert. After chilling for at least 4 hours, the flavors meld together beautifully, though overnight refrigeration delivers the best results. This waiting period allows the Oreos to soften slightly while maintaining enough texture to contrast with the creamy filling.
Decorating your dirt cake presents endless opportunities for creativity. Gummy worms might be the classic choice, but don’t hesitate to experiment with seasonal themes or personalized touches that match your event. The visual appeal of this dessert, especially when served in a clear trifle dish or individual cups, makes it an instant conversation starter.
The next time you need an impressive yet straightforward dessert, remember this foolproof Oreo dirt cake recipe. With just 10 minutes of preparation and minimal ingredients, you’ll create a dessert that guests will request repeatedly. Most importantly, enjoy the process – this playful dessert brings out the child in everyone who makes, serves, or devours it!
FAQs
Q1. What are the key ingredients for a classic Oreo dirt cake? The main ingredients for a classic Oreo dirt cake include Oreo cookies, instant vanilla or French vanilla pudding, milk, cream cheese, butter, powdered sugar, and whipped topping like Cool Whip. Optional add-ins like gummy worms can be used for decoration.
Q2. How long should I chill the Oreo dirt cake before serving? For the best flavor and texture, chill your Oreo dirt cake for at least 4 hours before serving. However, refrigerating it overnight (up to 24 hours) allows the flavors to meld together beautifully and provides optimal results.
Q3. Can I make Oreo dirt cake ahead of time for a party? Yes, Oreo dirt cake is perfect for making ahead. You can prepare the entire dessert up to 24 hours in advance and refrigerate it. For best results when preparing further ahead, store the crushed Oreos and pudding mixture separately and assemble just before serving.
Q4. What are some creative ways to decorate an Oreo dirt cake? Besides the classic gummy worms, you can create themed decorations like a garden scene with artificial flowers, a construction zone with toy tractors, or seasonal themes using candy pumpkins for Halloween or Peeps for Easter. You can also use golden Oreos for a “sandy beach” theme.
Q5. How should I store leftover Oreo dirt cake? Store leftover Oreo dirt cake in the refrigerator, tightly covered with plastic wrap or in an airtight container, for up to 3-5 days. Avoid leaving it at room temperature for more than an hour. While some suggest freezing is possible, it’s generally not recommended as it may affect the texture upon thawing.