How to Make the Perfect Chicken Caesar Wrap: A Chef’s Secret Recipe
Chicken Caesar wraps are the 15-minute meal that wins every time. Whether you need a quick weeknight dinner, a make-ahead meal, or a perfect picnic idea for the weekend, these wraps are bound to become a repeat recipe in your house.
Not only are these wraps fresh, crunchy, and creamy, but they’re also downright hearty. In fact, if you ask any Delish employee what they’re ordering for lunch from a deli, at least half would respond with a chicken Caesar wrap. I particularly love making them during summer when I don’t feel like turning on the oven. The classic Caesar salad concept is constantly being reinvented by cooks everywhere, and this wrap version might be one of the most practical iterations yet.
Finally, while you could use store-bought Caesar dressing to save time, the homemade version truly makes the recipe shine. In this guide, I’ll share my chef’s secrets for creating the perfect chicken Caesar wrap from selecting the right ingredients to mastering the assembly technique that prevents sogginess.
Gathering the Right Ingredients
The foundation of any exceptional chicken Caesar wrap begins with selecting quality ingredients. Creating this simple yet sophisticated meal requires attention to detail, starting with what goes inside your wrap.
Choosing the best chicken for wraps
Selecting the right chicken makes all the difference in your wrap’s texture and flavor. Leftover chicken from earlier in the week works perfectly here, allowing you to repurpose what you already have on hand. Alternatively, store-bought rotisserie chicken provides convenience without sacrificing taste. Many chefs prefer using chicken breast since the white meat absorbs Caesar flavors beautifully. For those who enjoy meal prepping, grilling several chicken breasts on Sunday creates a ready supply for wraps throughout the week. Remember that bone-in, skin-on chicken tends to remain more moist when prepared ahead of time.
Romaine vs. other lettuces
Romaine lettuce stands as the traditional choice for Caesar wraps, offering the perfect balance of crunch and freshness. The sturdy leaves hold dressing well without quickly becoming soggy. Nevertheless, several alternatives exist. Green leaf lettuce provides flexibility, whereas butter lettuce (also known as Boston or Bibb) excels at wrapping due to its natural cup-like shape and tear-resistant structure. Iceberg lettuce offers more water content, delivering a refreshing crunch, though it contains fewer nutrients than romaine. For those seeking extra nutrition, consider incorporating kale alongside romaine for added health benefits.
Optional add-ins: avocado, tomatoes, bacon
Beyond the basics, these additions elevate your wrap:
- Avocado – Contributes creamy texture and healthy fats
- Cherry tomatoes – Provide a fresh pop of flavor and juicy contrast
- Bacon – Adds a savory, smoky crunch that pairs wonderfully with Caesar flavors
Other creative options include Parmesan crisps for extra texture, sun-dried tomatoes for tangy sweetness, or roasted red peppers for smoky flavor. These additions transform a basic wrap into something special.
Picking the right tortilla
Large flour tortillas typically work best as they’re soft, slightly chewy, and contain all ingredients securely. Burrito-size (10-inch) tortillas provide ample space for generous fillings. Furthermore, whole wheat wraps offer a healthier alternative, whereas gluten-free options accommodate dietary restrictions. The Siete brand Almond Flour Tortillas present a low-carb option at only 10 grams of carbohydrates each. Specialty varieties like spinach or sun-dried tomato flavored tortillas can add interesting dimensions to your wrap.
Ultimately, gathering high-quality ingredients ensures your homemade chicken Caesar wrap surpasses anything from a deli counter.
Making the Perfect Caesar Dressing
A stellar Caesar dressing serves as the heart and soul of your chicken Caesar wrap. Creating this iconic dressing at home allows you to customize flavors exactly to your preference.
Classic Caesar vs. yogurt-based versions
Traditional Caesar dressing relies on egg yolks and oil for its creamy texture. However, Greek yogurt-based versions offer higher protein content with less fat, making them excellent alternatives for health-conscious eaters. Yogurt dressings maintain the tangy, creamy profile of classic Caesar but add a nutritional boost. Moreover, they eliminate concerns about raw eggs while still delivering that characteristic Caesar flavor.
Anchovy paste or filets?
Anchovies provide the distinctive umami foundation of Caesar dressing. For convenience, anchovy paste offers ready-to-use flavor that encourages more frequent use. Alternatively, anchovy filets provide more textural control and often a cleaner flavor. If you’re anchovy-averse, capers can serve as an excellent substitute – they deliver similar briny notes without the fishiness. Some recipes incorporate Worcestershire sauce instead, which actually contains anchovies in a more subtle form.
Balancing acidity and creaminess
A perfectly balanced Caesar dressing follows the golden ratio of 3:1 – three parts oil to one part acid. This proportion ensures neither flavor dominates. If your dressing becomes too acidic, add more oil or incorporate creamy elements like avocado or tahini. Conversely, an overly rich dressing benefits from additional lemon juice. Remember that salt, umami (from anchovies or capers), acid, and fat should harmonize rather than compete.
Quick blender method for dressing
The blender method creates smooth, emulsified dressing in under five minutes:
- Add garlic, anchovy paste, lemon juice, Dijon mustard, and Worcestershire to your blender
- Pulse to combine ingredients
- With the machine running, slowly stream in oil until emulsified
- Add Parmesan cheese last, pulsing briefly to incorporate
An immersion blender offers even faster results – simply place all ingredients in a jar and blend until creamy.
Step-by-Step Chicken Caesar Wrap Assembly
Initially, assembling your chicken Caesar wrap might seem straightforward, yet mastering the technique ensures every bite delivers perfect flavor balance. The assembly process transforms individual ingredients into a cohesive, portable meal.
Tossing the salad ingredients
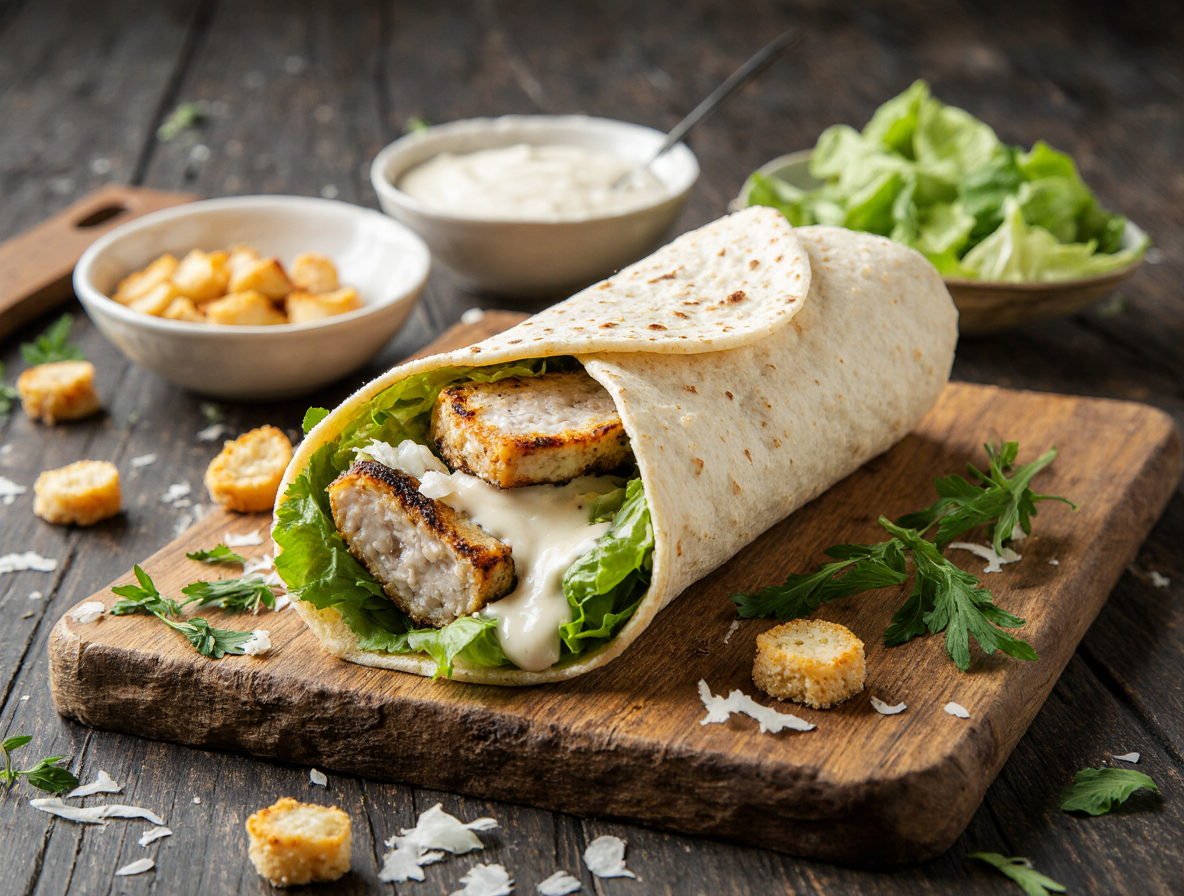
Begin by combining chopped romaine lettuce, diced chicken, Caesar dressing, Parmesan cheese, and croutons in a large bowl. Toss everything thoroughly until the ingredients are evenly coated with dressing. This mixing step ensures consistent flavor throughout your wrap. Consider adding the croutons last after roughly chopping them to maintain some crunch. For those who enjoy extra texture, bacon bits can be incorporated during this stage.
Layering the wrap for even distribution
Lay your tortilla flat on a clean work surface. Some chefs recommend microwaving it for 10-15 seconds to increase pliability and prevent tearing. When layering, create a barrier between wet ingredients and the tortilla by placing lettuce down first. Arrange your chicken Caesar mixture down the center, leaving about an inch of space around the edges. This careful placement helps achieve balanced flavor in each bite and prevents spillage during rolling.
How to roll a wrap tightly
Follow these steps for a perfectly rolled wrap:
- Fold the bottom edge of the tortilla up about one-third of the way
- Fold both left and right sides toward the center
- Continue rolling from the bottom until you reach the top edge
- Apply a small amount of sauce to the top edge as a natural adhesive
- Press firmly to seal the wrap closed
Secure with foil or parchment paper if not eating immediately, which helps maintain shape.
Tips to prevent sogginess
Soggy wraps ruin the experience, accordingly, use these professional techniques: create a lettuce barrier between moist ingredients and the tortilla, pack dressings separately when preparing wraps ahead of time, avoid excess tomatoes which release moisture, and butter the inside of the tortilla to create a moisture barrier. Additionally, wrapping completed wraps in parchment paper allows them to breathe and prevents moisture buildup. For meal prep, store components separately until assembly time.
Make-Ahead, Storage, and Variations
Preparing chicken Caesar wraps ahead of time opens up possibilities for quick meals throughout the week. By following a few simple storage techniques, these wraps can remain fresh and delicious whenever you’re ready to enjoy them.
How to store wraps without sogginess
Soggy wraps are easily avoided with proper technique. First, wrap assembled wraps tightly in aluminum foil or parchment paper, which helps maintain freshness for up to 2 days in the refrigerator. Alternatively, store ingredients separately—especially the dressing—until just before serving. For meal prep enthusiasts, covering wraps with a damp paper towel prevents tortillas from drying out, especially gluten-free varieties. Another chef’s trick: use large lettuce leaves as a moisture barrier between wet ingredients and the tortilla.
Grilled chicken Caesar wrap recipe variation
Grilled chicken elevates the classic Caesar wrap with smoky flavor. Beyond basic grilled chicken, experiment with leftover rotisserie chicken, which adds convenience and deeper flavor. For protein alternatives, try grilled shrimp, steak, or even leftover holiday turkey. Even fried chicken can create an indulgent twist on this classic recipe.
Low-carb and gluten-free options
For carb-conscious eaters, Siete Almond Flour Tortillas offer a satisfying alternative with only 10 grams of carbohydrates each. Lettuce wraps using romaine, butter lettuce, or collard greens provide virtually zero-carb options. Gluten-free wraps made from coconut flour, oat flour, or flaxseed meal deliver both nutrition and structure.
Kid-friendly and lunchbox tips
Making wraps lunchbox-friendly requires strategic packing. Skip adding dressing directly to wraps; instead, include it in a small container for dipping. Pack veggies and fruits in separate compartments to maintain crispness. Involving children in preparation encourages healthy eating habits and independence.
Conclusion
Chicken Caesar wraps truly stand as one of the most versatile meals you can master in your kitchen. Throughout this guide, we’ve explored everything from selecting premium ingredients to perfecting the art of wrap assembly. The beauty of these wraps lies not only in their delicious flavor but also their adaptability to different dietary needs and preferences.
The right chicken preparation forms the foundation of an exceptional wrap, while fresh romaine provides that signature crunch we all crave. Additionally, homemade Caesar dressing elevates this simple meal to restaurant quality with minimal effort. Most importantly, the proper rolling technique ensures every bite contains the perfect balance of flavors without the dreaded sogginess that ruins many wraps.
These wraps have become a staple in my cooking repertoire because they work equally well as quick weeknight dinners or make-ahead lunches. You can certainly customize them based on what you have available – perhaps adding bacon for smokiness or avocado for creaminess. The basic formula remains foolproof regardless of how you choose to modify it.
Next time you find yourself short on time but unwilling to compromise on flavor, remember this chicken Caesar wrap recipe. Your family will thank you, your lunchbox will thank you, and your busy schedule will thank you. After all, few meals deliver this much satisfaction with so little effort!
FAQs
Q1. What are the key ingredients for a perfect chicken Caesar wrap? The key ingredients include grilled or rotisserie chicken, fresh romaine lettuce, Parmesan cheese, croutons, and a homemade Caesar dressing. Optional add-ins like avocado, tomatoes, or bacon can enhance the flavor and texture.
Q2. How do you prevent a chicken Caesar wrap from becoming soggy? To prevent sogginess, create a barrier by placing lettuce down first on the tortilla. You can also pack wet ingredients separately, use less tomatoes, and wrap the completed wrap in parchment paper to allow it to breathe.
Q3. Can I make chicken Caesar wraps ahead of time? Yes, you can prepare chicken Caesar wraps ahead of time. Store assembled wraps tightly wrapped in aluminum foil or parchment paper in the refrigerator for up to 2 days. For best results, keep ingredients separate and assemble just before eating.
Q4. What’s the best way to roll a chicken Caesar wrap? To roll the wrap tightly, fold the bottom edge up about one-third of the way, then fold both sides toward the center. Continue rolling from the bottom until you reach the top edge. Apply a small amount of sauce to the top edge to seal it closed.
Q5. Are there any low-carb or gluten-free options for chicken Caesar wraps? Yes, there are several options for low-carb and gluten-free wraps. You can use almond flour tortillas for a low-carb option, or try lettuce wraps using romaine or butter lettuce for a virtually zero-carb alternative. Gluten-free wraps made from coconut flour or flaxseed meal are also available.