The Secret to Perfect Cheesecake Tacos: A Foolproof Recipe Guide

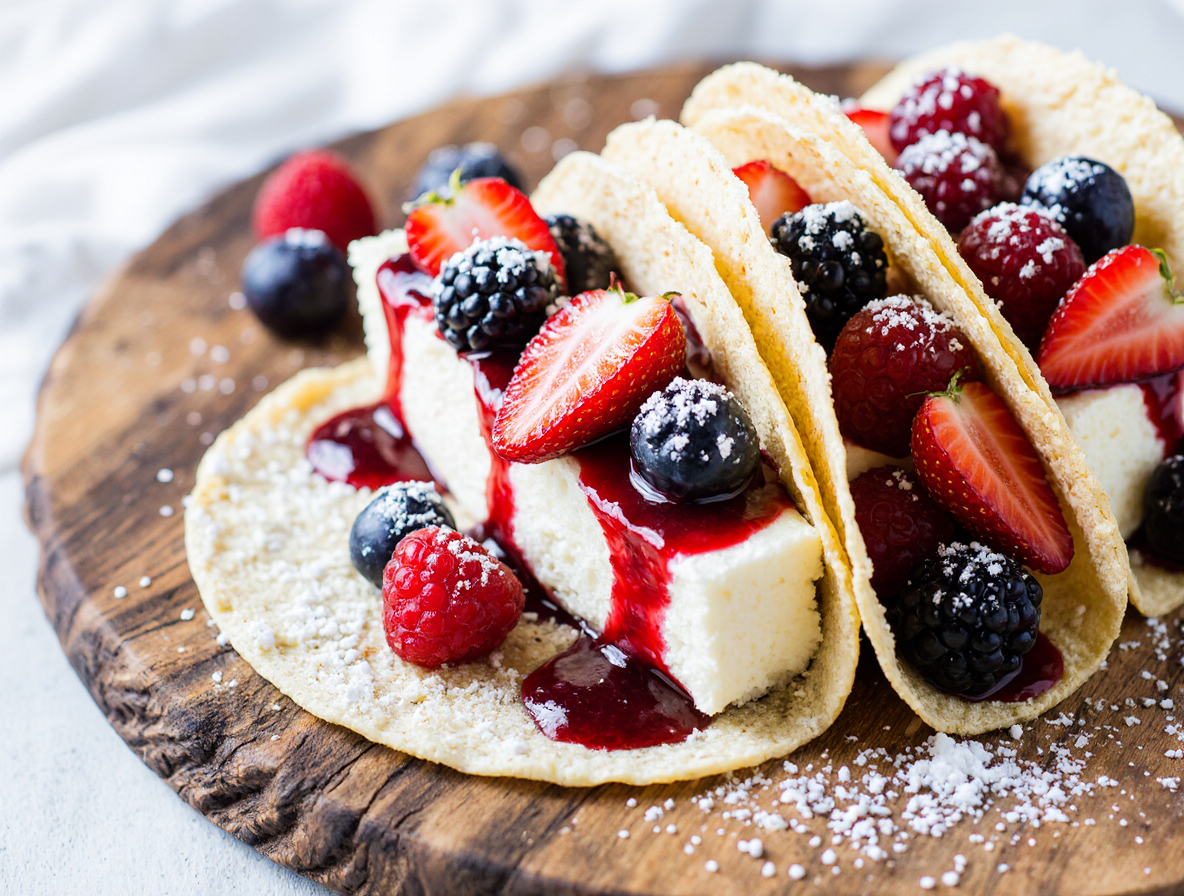
Cheesecake taco recipes combine everything we love about dessert into one irresistible handheld treat! Imagine the creamy, tangy sweetness of cheesecake wrapped in a warm, crispy cinnamon-sugar taco shell and topped with juicy berries. These dessert tacos are already the rockstars of handheld food, but they’ve deliciously crossed over to the sweet side.
When I first discovered how to make cheesecake tacos, I was amazed by their versatility. The crunchy tortilla shells, coated with graham cracker crumbs and sugar, create the perfect contrast to the smooth, rich filling. Additionally, they’re surprisingly easy to prepare, making them ideal for impressing guests or treating your family to something special without excessive effort. Whether you prefer a strawberry cheesecake taco recipe or the classic blueberry version, these treats offer a refreshingly fun dessert alternative that will easily become everyone’s new favorite. In this guide, I’ll share my foolproof easy cheesecake taco recipe, including how to create that perfect graham cracker taco shell that balances the entire dessert.
Essential Ingredients for Cheesecake Tacos
Creating perfect cheesecake tacos starts with gathering the right ingredients. The magic of this dessert lies in the balance between crispy shells, creamy filling, and fresh toppings. Let me share what you’ll need to create this delicious treat.
Tortilla shells and graham cracker coating
The foundation of any cheesecake taco recipe begins with the shells. Street-sized flour tortillas are ideal for creating perfectly proportioned dessert tacos. These smaller tortillas crisp up beautifully while maintaining their shape. For the coating, you’ll need graham cracker crumbs (preferably cinnamon sugar variety), melted butter, and granulated sugar. Some recipes call for 1 cup of graham cracker crumbs mixed with 2 tablespoons of sugar, while others recommend combining the crumbs with melted butter before coating the tortillas. This graham cracker coating creates that distinctive cheesecake crust flavor that complements the filling perfectly.
Creamy cheesecake filling components
The heart of cheesecake tacos is the luscious filling. Full-fat cream cheese (8 ounces, softened to room temperature) forms the base of this creamy mixture. To achieve the perfect sweetness, you’ll need confectioners’ sugar (powdered sugar), typically 1/4 to 1/3 cup depending on your preferred sweetness level. Pure vanilla extract (1-2 teaspoons) adds that classic flavor depth. Heavy whipping cream (1-1/2 cups) is essential for creating the light, mousse-like texture. Some recipes incorporate additional ingredients like cheesecake pudding mix for extra flavor or a teaspoon of lemon zest to brighten the filling.
Fruit toppings and optional garnishes
Furthermore, the toppings truly make cheesecake tacos special. Fresh strawberries are a classic choice, either sliced or made into a compote with sugar. Cherry pie filling (21-ounce can) offers a convenient and flavorful alternative. However, the possibilities extend far beyond these options. Consider these creative garnishes:
- Chocolate, caramel, or hot fudge drizzles
- Fresh fruit medleys (blueberries, raspberries, mangoes)
- Nutella or other chocolate-hazelnut spreads
- Crushed cookies or brownie bits
- Sprinkles or whipped cream for extra flair
These ingredients come together to create a dessert that’s simultaneously crunchy, creamy, and bursting with fruity freshness. The beauty of cheesecake tacos lies in their adaptability – once you master the basic formula, you can experiment with countless flavor combinations.
How to Make Cheesecake Tacos Step-by-Step
The process of creating cheesecake tacos is both fun and straightforward. I’ve broken down this sweet creation into four easy-to-follow steps that will have you serving up these delightful treats in no time.
1. Prepare the graham cracker taco shell
First, preheat your oven to 375-400°F. Using a 3.5-4 inch cookie cutter, cut circles from flour tortillas—you’ll get about 3 rounds from each 9-inch tortilla. Next, poke several holes in each tortilla with a fork to prevent air bubbles during baking.
Melt some butter and prepare a mixture of graham cracker crumbs and sugar in a shallow dish. Brush or dip each tortilla circle into the melted butter, coating both sides. Subsequently, press the buttered tortilla into the graham cracker mixture, ensuring both sides are well-coated.
Turn a muffin tin upside down and tuck the coated tortillas between the cups to create taco shapes. Bake for 10-12 minutes until the edges turn golden brown and crisp. Allow the shells to cool completely while still on the pan—this helps them maintain their shape.
2. Whip up the cheesecake filling
In a large mixing bowl, beat softened cream cheese until smooth and creamy. Add powdered sugar and vanilla extract, mixing until well combined. For extra flavor, some recipes suggest adding a teaspoon of lemon zest.
In a separate bowl, whip heavy cream until stiff peaks form. Gently fold this into your cream cheese mixture until everything is smoothly incorporated. The result should be light and fluffy—this is what gives your cheesecake tacos that perfect mousse-like texture.
Refrigerate the filling for at least 30 minutes before assembly. This chilling step is crucial as it helps the filling firm up, making it easier to pipe into the shells.
3. Assemble with fruit toppings
Once your shells are completely cooled and your filling is properly chilled, it’s time for assembly. Transfer the cheesecake filling to a piping bag fitted with a large star tip, or simply cut the corner off a ziplock bag.
Pipe the filling generously into each taco shell. For a professional touch, start piping in the middle of the shell, move to one edge, back to center, to the other edge, and finish in the center.
Top each filled taco with your prepared fruit topping. Fresh strawberries, cherry pie filling, or blueberry compote all work beautifully.
4. Chill before serving for best texture
For optimal flavor and texture, chill the assembled tacos for at least 15-20 minutes before serving. Nevertheless, if you’re making these treats ahead of time, store the shells and filling separately until shortly before serving.
The shells can be stored at room temperature in an airtight container for 3-4 days, while the filling should be kept refrigerated. For the freshest results, assemble your cheesecake tacos no more than a few hours before serving.
Creative Variations and Flavor Swaps
One thing I love about cheesecake tacos is their endless adaptability. With just a few ingredient swaps, you can create entirely different flavor experiences while maintaining that perfect balance of crunch and creaminess.
Strawberry cheesecake taco recipe
Strawberry remains the classic favorite for cheesecake tacos. To create a standout strawberry version, I combine fresh quartered strawberries with strawberry glaze, tossing until well coated. After piping the cream cheese filling into the graham shells, I top generously with the glazed berries. For an elevated twist, consider making a Strawberry Crunch variation by coating your taco shells in white chocolate and strawberry crunch coating instead of the traditional graham mixture.
Using Nutella, caramel, or chocolate drizzle
Beyond fruit, dessert tacos shine with decadent drizzles. Nutella creates a heavenly pairing with the cheesecake filling, especially when combined with sliced bananas or strawberries. Another crowd-pleaser involves drizzling caramel sauce over apple pie filling for caramel apple cheesecake tacos. Chocolate lovers might prefer adding cocoa powder to the cheesecake mixture for a chocolate filling, then finishing with a hot fudge drizzle. Other delicious options include:
- Butterscotch or dulce de leche
- Peanut butter drizzle
- White chocolate coating
Fresh fruit vs. jam toppings
Fresh berries offer bright flavor and beautiful presentation, yet jam-based toppings provide convenience and concentrated sweetness. For a quick semi-homemade approach, mix chopped fresh strawberries with strawberry jam to create an instant “sauce” without cooking. Alternatively, warm pie fillings (cherry, blueberry, peach) make excellent ready-made toppings that maintain their consistency.
Mini vs. full-size taco shells
Size matters when creating the perfect dessert taco experience. Standard recipes typically use 4-inch circles cut from tortillas, yielding 3-4 rounds per tortilla. For bite-sized treats, use a smaller 3-inch cutter to create mini dessert tacos—perfect for parties where guests want to sample multiple flavors. Conversely, using flat-bottom taco shells creates a sturdier base that holds more filling—ideal for elaborate topping combinations.
Storage, Serving, and Make-Ahead Tips
Properly storing your cheesecake tacos is crucial for maintaining their delicious flavor and texture. Following these tips will help you serve perfect cheesecake tacos every time, even when preparing ahead.
How to store shells and filling separately
First of all, never store assembled cheesecake tacos for long periods—the shells quickly lose their crispness. Keep the components separate until serving time. Store graham cracker taco shells in an airtight container at room temperature for 1-2 days. For longer freshness, they can last up to 3-4 days in a dry container. The cheesecake filling requires refrigeration and remains fresh for 3-4 days in an airtight container. In fact, some sources suggest the filling can be stored for up to a week or even frozen for up to 6 months with proper thawing techniques.
Best time to assemble for freshness
To maintain the perfect texture contrast, assemble your cheesecake taco recipe just before serving. As a result, your shells stay crispy while the filling remains creamy. For parties, you might prepare components ahead of time, yet assemble only a few hours before serving. Given that assembled tacos don’t hold up well in containers—they’ll become soft and may slide around—always pack shells and filling separately if transporting to events.
Serving ideas for parties and brunch
Create a memorable dessert experience with these serving ideas:
- Set up a “dessert taco bar” with shells coated in different options (cinnamon-sugar or graham cracker crumbs) and various toppings
- Provide cheesecake filling, multiple fruit options, and whipped cream for guests to build custom tacos
- Arrange pre-assembled tacos on a tiered stand for an impressive presentation
How long leftovers last
Once assembled, cheesecake tacos generally last 1-2 days in refrigeration. Most importantly, remember that the quality diminishes quickly as shells soften. Keep in mind that home-cooked foods must be refrigerated within two hours of preparation. Prior to refrigerating, ensure your container is dry to prevent excess moisture from affecting the shells.
Conclusion
Cheesecake tacos truly represent the perfect marriage of texture and flavor. The crispy, graham-coated shells paired with creamy filling and fresh toppings create a dessert experience unlike any other. Throughout this guide, we’ve explored everything from essential ingredients to creative variations that make these treats so special.
While the concept might seem fancy, the execution remains surprisingly straightforward. You can easily master these delightful treats with basic ingredients and simple techniques. Additionally, the make-ahead options allow for stress-free entertaining – just store shells and filling separately until shortly before serving.
Perhaps the greatest charm of cheesecake tacos lies in their adaptability. Whether you prefer classic strawberry, decadent chocolate, or exotic flavor combinations, these dessert tacos accommodate endless personalization. This versatility makes them perfect for both family desserts and impressive party centerpieces.
My family now requests these treats for special occasions, and guests always ask for the recipe. The balance of sweet, tangy, creamy, and crunchy elements creates an irresistible dessert that satisfies multiple cravings at once.
Therefore, I encourage you to try this recipe soon. Start with the classic version, then let your creativity guide you toward your own signature variations. After all, the best part about mastering cheesecake tacos isn’t just enjoying them yourself – it’s watching others delight in your sweet creation too!
FAQs
Q1. What are the key ingredients needed for cheesecake tacos? The main ingredients include flour tortillas, graham cracker crumbs, cream cheese, powdered sugar, vanilla extract, heavy whipping cream, and fruit toppings like strawberries or cherry pie filling.
Q2. How long can I store cheesecake taco components? The graham cracker taco shells can be stored at room temperature for 3-4 days in an airtight container. The cheesecake filling can be refrigerated for 3-4 days or frozen for up to 6 months.
Q3. Can I make cheesecake tacos ahead of time? It’s best to prepare the components ahead of time but assemble the tacos just before serving. You can make the shells and filling in advance and store them separately, then assemble a few hours before serving for the best texture and freshness.
Q4. What are some creative variations for cheesecake tacos? You can try different flavors like Nutella, caramel, or chocolate drizzle. You can also experiment with various fruit toppings, use jam instead of fresh fruit, or create mini versions using smaller tortilla circles.
Q5. How do I prevent my cheesecake tacos from getting soggy? To keep the shells crispy, store them separately from the filling until just before serving. When assembling, avoid over-filling the shells, and if possible, add fruit toppings right before eating to prevent excess moisture from softening the shells.