
The Secret to Perfect Roast Chicken: A Foolproof Recipe That Never Fails
A perfect roast chicken recipe is one of the most valuable skills any home cook can master. Surprisingly, it requires just four simple ingredients: chicken, salt, pepper, and herbs, making it accessible to cooks of all experience levels. With an impressive 4.8 out of 5 rating from over 4,138 reviews, our foolproof method delivers consistent results every time.
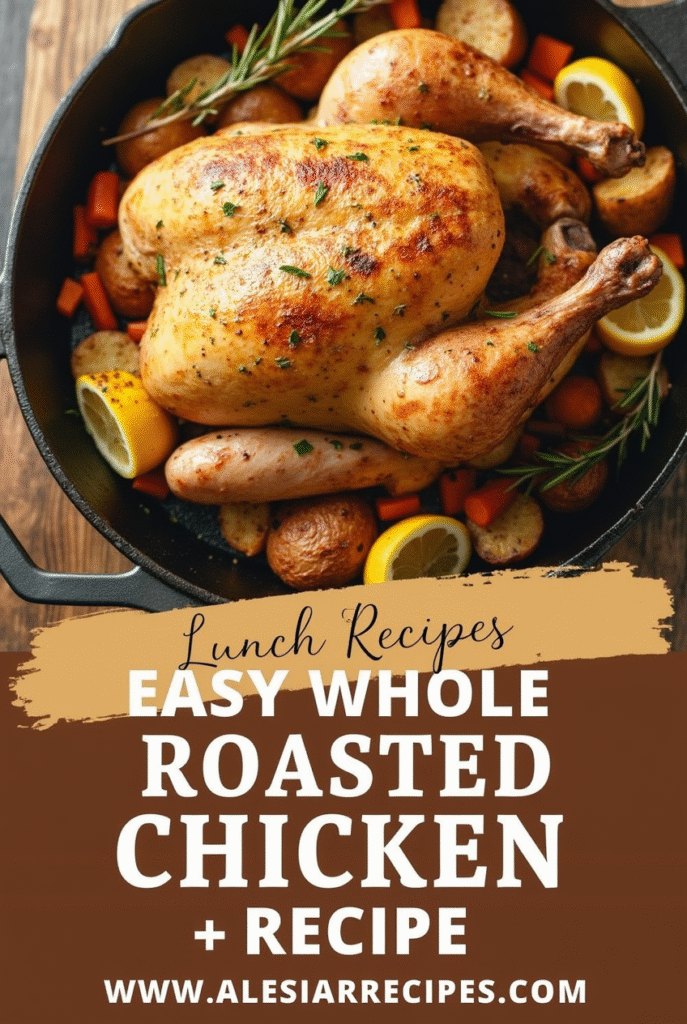
We’ve discovered that the secret to a whole roast chicken recipe lies in the details. From choosing the right size chicken (typically 4-5 pounds) to roasting at the perfect temperature (425°F for 70-90 minutes), how to roast a chicken properly is all about understanding the fundamentals. In fact, learning how to roast a whole chicken can take as little as five minutes of prep time, making this simple roast chicken recipe ideal for both weeknight dinners and special occasions. Our easy roast chicken recipe ensures your chicken reaches the critical internal temperature of 165°F while maintaining a beautifully crisp skin and juicy meat.
Choosing the Right Chicken and Tools
The foundation of any exceptional roast chicken recipe begins long before you turn on the oven. Selecting the right ingredients and equipment makes all the difference between a mediocre meal and a memorable feast that your family will request again and again.
What size chicken should you buy?
For the most consistent results, choose a chicken weighing between 3½ to 5 pounds. A 4-pound bird is particularly ideal since smaller chickens roast more evenly—once the breast meat reaches proper doneness, the dark meat will be perfectly cooked too.
Larger birds (above 5 pounds) tend to come from older chickens with tougher, more developed muscles, which can result in drier meat. If you’re cooking for a crowd, consider roasting two smaller chickens instead of one large one for more tender, juicy results.
When shopping, look for a natural roasting chicken without pre-injected seasonings or salt. This gives you complete control over the flavor profile of your simple roast chicken recipe.
Best pans for roasting
Your choice of roasting vessel significantly impacts your results. For crispy skin all around, heavy-duty rimmed baking sheets offer an advantage—their low sides allow maximum exposure to hot air circulation. This is perfect when learning how to roast a chicken for the first time.
For traditional whole roast chicken recipes, a sturdy roasting pan with these features works best:
- Fixed, wide handles you can grip with oven mitts
- Sides approximately 3 inches high
- Rectangular shape (more versatile than oval)
- Tri-ply stainless steel construction for even heating
Cast iron skillets make excellent roasting vessels, too. Preheating the skillet before adding your chicken creates crispy skin on the back and thighs without flipping and can reduce cooking time by about 15 minutes.
A roasting rack elevates your bird, allowing air to circulate underneath for even cooking. V-shaped or U-shaped racks provide better stability than flat ones, preventing the raw chicken from sliding around.
Why air-chilled chicken matters
The processing method makes a remarkable difference in your final dish. Air-chilled chickens are cooled individually using purified cold air rather than communal water baths.
Air-chilled chicken delivers superior results because:
- It contains no absorbed water, resulting in more concentrated flavor
- The skin remains taught rather than waterlogged, creating exceptionally crispy skin when roasted
- It cooks faster and absorbs seasonings better
- There’s less risk of bacterial cross-contamination (80% less bacteria than water-chilled)
Additionally, when buying water-chilled chicken, approximately 8% of what you’re paying for is actually water weight. With air-chilled chicken, you’re getting pure meat and better value for your easy roast chicken recipe.
Simple Ingredients for Big Flavor
The magic of a truly memorable roast chicken recipe lies not in complex techniques but in a handful of quality ingredients that work together harmoniously. Moreover, with just a few pantry staples, you can create chicken that’s bursting with flavor.
Basic seasoning essentials
For a foolproof roast chicken, you need surprisingly few seasonings. Salt remains the most crucial element—kosher salt is preferred by many chefs. Black pepper provides essential warmth, while dried herbs like thyme, rosemary, and sage create a classic flavor foundation. For those who enjoy a bit of heat, a pinch of cayenne pepper adds subtle warmth without overwhelming.
Furthermore, garlic powder and onion powder create depth without burning (unlike fresh versions that can blacken during roasting). A sprinkle of paprika not only adds flavor but also helps achieve that gorgeous golden-brown color that makes mouths water.
Optional aromatics for the cavity
The cavity of your chicken offers a golden opportunity to amplify flavor. Stuffing it with fresh lemon quarters introduces brightness and helps keep the meat moist. Whole garlic cloves and onion slices release aromatic compounds that infuse the meat from within.
Fresh herbs like rosemary sprigs and thyme make excellent additions to the cavity. Alternatively, celery stalks can provide subtle vegetal notes while releasing additional moisture as the chicken cooks.
Butter vs. olive oil: which to use?
This debate comes down to priorities. Butter creates rich flavor but can make the skin splotchy as it has a lower smoke point. The milk solids in butter brown beautifully in the oven, creating golden skin.
Olive oil, especially extra virgin, offers more consistent browning and makes it easier to coat the chicken evenly. It withstands higher temperatures without burning, ensuring your skin browns rather than blackens.
For the best of both worlds, consider this chef-approved approach: spread butter between the skin and meat for flavor, then coat the outside with olive oil for perfect browning.
Step-by-Step: How to Roast a Whole Chicken
Mastering the precise technique for roasting chicken transforms this classic dish from ordinary to extraordinary. With careful attention to each step, even novice cooks can achieve restaurant-quality results at home.
1. Prep the chicken: drying and trussing
First and foremost, pat your chicken completely dry with paper towels—this step is essential for achieving crispy skin. Moisture on the surface creates steam, preventing proper browning. A properly dried chicken will reward you with that coveted golden exterior.
Trussing helps your chicken cook evenly by keeping the wings and legs close to the body. This prevents smaller parts from drying out or overcooking. To truss simply:
- Place the chicken breast-side up
- Tuck the wing tips under the body
- Cross the legs at the ankles
- Use kitchen twine to tie the legs together securely
If you don’t have twine, make small slits in the excess skin near the cavity and tuck the legs through these openings.
2. Seasoning inside and out
Season the cavity generously with salt and pepper before adding aromatics. Subsequently, season the outside, making sure to get under the skin where possible. For optimal flavor penetration, consider dry-brining your chicken for 1-24 hours in the refrigerator.
Apply your chosen fat (butter or oil) liberally over the entire surface. Meanwhile, stuff the cavity with lemon quarters, garlic cloves, or fresh herbs to infuse the meat with flavor from within.
3. Roasting temperature and time
For the perfect balance of crispy skin and juicy meat, start at 450°F for 10-20 minutes, consequently reducing to 350°F for the remainder of cooking. This initial high heat helps develop that beautiful golden crust.
In general, roast for approximately 20 minutes per pound at 350°F. A 3-4 pound chicken typically requires 60-90 minutes total cooking time.
4. How to check for doneness
Above all, temperature is the most reliable indicator of doneness. Insert an instant-read thermometer into the thickest part of the thigh (avoiding bone) until it registers 165°F.
Alternative checks include:
- Clear (not pink) juices when piercing the thigh
- No visible pink meat at the thigh-body junction
- Legs that move easily in their sockets
5. Letting it rest before carving
Following removal from the oven, allow your chicken to rest for 15-20 minutes. This crucial step permits muscle fibers to relax and juices to redistribute throughout the meat.
For crispy skin, rest the chicken uncovered. Alternatively, tent loosely with foil for juicier meat (though this may soften the skin slightly). As a result of proper resting, carving becomes easier and every slice stays moist and flavorful.
Serving, Storing, and Using Leftovers
Your roast chicken journey doesn’t end when the timer rings. Proper serving, carving, and storage are equally important for maximizing enjoyment of your culinary masterpiece.
Best side dishes to pair with roast chicken
The versatility of a simple roast chicken recipe truly shines through the sides you choose to accompany it. Crispy roast potatoes with rosemary create a perfect textural contrast, primarily because their crisp exterior complements the juicy meat. For lighter options, consider Brussels sprouts roasted with Parmesan, which add a nutty dimension to your meal.
Fresh salads provide a welcome brightness—bitter greens like radicchio or endive tossed with tangerine vinaigrette balance the richness of your whole roast chicken recipe. Alternatively, traditional sides like mashed potatoes with garlic and herbs offer comforting familiarity that never disappoints.
How to carve a whole roast chicken
Before carving, let your roasted chicken rest for 10-15 minutes on a clean cutting board. Start with a sharp carving knife and sturdy fork, accordingly:
- Hold the chicken steady with a fork and cut through the skin between the leg and body
- Cut through the hip joint, removing the entire leg
- Place the leg skin-side down and cut through the joint between drumstick and thigh
- Make a horizontal cut near the base of the chicken
- Hold the chicken near the breastbone and cut along one side of the breast
- Slice the breast meat if desired
- Remove the wings by bending them away from the body and cutting through the joint
Storing leftovers safely
After your meal, refrigerate leftover chicken within 2 hours of sitting at room temperature. The USDA recommends using refrigerated cooked chicken within 3-4 days. Store in airtight containers at 40°F or below.
When checking if stored chicken is still good, examine for firmness and dryness. Certainly discard it if it develops a slimy texture, soft touch, objectionable odor, or darkens in color.
Creative ways to use leftover chicken
Leftover chicken transforms easily into quick lunches like grain bowls and salads. Create sandwiches ranging from classic chicken salad to creative banh mi with apple-kale slaw. Ultimately, comfort foods like chicken enchiladas, pot pies, and buffalo-chicken macaroni and cheese showcase how versatile these leftovers can be.
For international flair, incorporate leftover chicken into teriyaki fried rice or chicken bulgogi lettuce wraps—both ready in minutes and bursting with flavor.
Conclusion
Mastering the art of roast chicken truly stands as one of the most rewarding culinary skills anyone can develop. Throughout this guide, we’ve broken down what might seem intimidating into manageable steps that guarantee success. Most compelling evidence shows that perfect results come from attention to details—choosing the right 4-pound bird, properly drying the skin, and allowing adequate resting time after cooking.
Quality ingredients speak volumes in this classic dish. Accordingly, selecting an air-chilled chicken provides superior flavor concentration and crispier skin. The simplicity of salt, pepper, and herbs demonstrates that exceptional cooking often requires fewer components, not more.
Time and temperature control undoubtedly create the perfect balance between juicy meat and crackling skin. Remember, your chicken needs to reach that critical internal temperature of 165°F while maintaining moisture. Afterward, the crucial resting period allows juices to redistribute throughout the meat.
This foolproof method works equally well for weeknight family dinners or special occasions. Additionally, leftover chicken transforms easily into sandwiches, salads, and creative international dishes, making your initial effort stretch across multiple meals.
Lastly, we hope this comprehensive guide gives you confidence to prepare perfect roast chicken consistently. The techniques shared here build fundamental cooking skills applicable to many other dishes. Armed with this knowledge, you’ll never need to worry about serving a memorable, impressive meal that draws everyone to the table. Your reputation as the family’s roast chicken expert awaits!
FAQs
Q1. What’s the ideal size for a roast chicken? A 4-pound chicken is perfect for roasting. It cooks evenly, ensuring that both the breast and dark meat reach the proper doneness simultaneously.
Q2. How can I achieve crispy skin on my roast chicken? To get crispy skin, thoroughly pat the chicken dry with paper towels before seasoning. Start roasting at a high temperature (450°F) for 10-20 minutes, then reduce to 350°F for the remaining cooking time.
Q3. What’s the best way to season a roast chicken? Season generously with kosher salt and black pepper, both inside the cavity and on the skin. You can also add dried herbs like thyme, rosemary, and sage for additional flavor.
Q4. How do I know when my roast chicken is done? The most reliable method is to use an instant-read thermometer. Insert it into the thickest part of the thigh, avoiding the bone. The chicken is done when it reaches an internal temperature of 165°F.
Q5. How long should I let the chicken rest before carving? Allow your roast chicken to rest for 15-20 minutes after removing it from the oven. This crucial step allows the juices to redistribute throughout the meat, ensuring moist and flavorful slices.